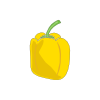
Yellow bell peppers are bright, sweet vegetables known for their sunny color, crisp texture, and mild, fruity flavor. They are fully ripened bell peppers, harvested after the green stage but before turning orange or red. The fruits are glossy, thick-walled, and blocky in shape, growing on sturdy plants with broad green leaves and small white flowers.
Thriving in warm, sunny conditions, yellow bell peppers are rich in vitamins—especially vitamin C—and antioxidants. Their gentle sweetness and vibrant colour make them popular in fresh salads, stir-fries, roasted dishes, and stuffed recipes. Valued for both their taste and visual appeal, yellow bell peppers add freshness and brightness to a wide range of meals.
How To Grow
-
Choose the Right Conditions Yellow bell peppers need warm temperatures and full sun. Ideal growing temperatures are 18–30°C (65–85°F). Protect plants from cold winds and frost.
-
Start Seeds Sow seeds indoors 8–10 weeks before the last frost. Plant seeds about 0.5–1 cm (¼ inch) deep. Keep soil warm and moist; seeds germinate in 7–14 days.
-
Transplanting Transplant outdoors once all danger of frost has passed. Harden off seedlings gradually. Space plants 45–60 cm (18–24 inches) apart.
-
Soil Use fertile, well-drained soil rich in organic matter. Mix compost into the soil before planting. Soil pH should be 6.0–6.8.
-
Watering Water regularly to keep soil evenly moist. Avoid drying out or overwatering. Mulch to conserve moisture and regulate soil temperature.
-
Feeding Feed every 2–3 weeks with a balanced or high-potassium fertilizer once flowering begins. Avoid excess nitrogen, which leads to leafy growth instead of fruit.
-
Support and Care Stake plants if fruits become heavy. Remove damaged leaves for better airflow. Watch for pests such as aphids and spider mites.
-
Ripening to Yellow Peppers begin green and gradually turn yellow. Allow fruits to fully colour for best flavour and sweetness.
With warmth, sunlight, and consistent care, yellow bell peppers will produce bright, flavourful fruits throughout the growing season.
Harvesting
-
When to Harvest Yellow bell peppers are ready when they are fully yellow, firm, and glossy. This usually occurs 2–3 weeks after the green stage. Fully colored peppers have the best flavor and sweetness.
-
How to Harvest Use sharp scissors or pruning shears. Cut the stem just above the pepper, leaving a short piece attached. Do not pull the fruit off by hand, as this can damage the plant.
-
Harvest Regularly Pick ripe peppers promptly to encourage continued production. Frequent harvesting helps the plant focus on new fruit.
-
Handle with Care Yellow bell peppers bruise easily. Handle gently to avoid damaging the skin.
-
After Harvest Care Store peppers unwashed in the refrigerator for 1–2 weeks. Wash just before use. Peppers can also be sliced and frozen for longer storage.
Harvesting at the right time ensures sweet flavour, crisp texture, and ongoing yields.
Common Problems
Common Problems with Yellow Bell Peppers
Pests
- Aphids – Small insects that cluster on new growth and undersides of leaves, causing curling and stunted growth. Blast off with water or use insecticidal soap.
- Spider Mites – Tiny mites that cause stippled, yellowing leaves, especially in hot, dry conditions. Increase humidity and use miticide sprays if needed.
- Whitefly – Clouds of tiny white insects that weaken plants by sucking sap. Use sticky yellow traps and insecticidal soap.
- Thrips – Cause silvery streaking on leaves and can spread viruses. Use reflective mulch and insecticidal treatments.
- Slugs and Snails – Damage young seedlings and stems, particularly in cool, wet weather. Use barriers or slug pellets.
Diseases
- Blossom End Rot – Dark, sunken patches at the base of the fruit caused by calcium deficiency or irregular watering. Maintain consistent moisture and ensure adequate calcium in the soil.
- Damping Off – Seedlings collapse at soil level due to fungal infection. Use sterile seed compost and avoid overwatering.
- Powdery Mildew – White powdery coating on leaves in warm, humid conditions. Improve airflow and avoid overhead watering.
- Verticillium and Fusarium Wilt – Soil-borne fungal diseases causing wilting and yellowing. Rotate crops and use resistant varieties.
- Mosaic Virus – Causes mottled, distorted leaves spread by aphids. Remove affected plants and control aphid populations.
Growing Problems
- Blossom Drop – Flowers falling before setting fruit, often caused by temperature extremes, drought, or excess nitrogen. Maintain steady conditions.
- Sunscald – Pale, papery patches on fruit exposed to intense sun. Ensure adequate foliage cover.
- Leggy Seedlings – Caused by insufficient light during early growth. Provide bright light or use grow lights indoors.