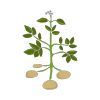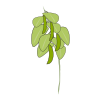
Broad beans, also known as fava or faba beans, are cool-season legumes prized for their sturdy plants and nutritious, protein-rich seeds. Plants grow upright on thick, hollow stems with soft grey-green leaves and striking white flowers marked with distinctive black or purple blotches. These flowers develop into long, slightly fuzzy green pods, each containing several large, flat beans nestled in a soft white lining.
Thriving in cool temperatures, broad beans are among the easiest and most rewarding vegetables to grow. As nitrogen-fixing legumes, they draw atmospheric nitrogen into the soil through root nodules, improving soil fertility and benefiting crops grown in the same bed in subsequent seasons. They are well suited to being sown in autumn for overwintering or in early spring for a late-spring to early-summer harvest.
Broad beans are enjoyed fresh, dried, or cooked in a wide variety of dishes — from simple buttered beans to hearty stews and dips. Young pods can even be eaten whole when picked very small. Appreciated for their rich flavour, nutritional value, and contribution to sustainable, low-input gardening, broad beans are a staple of vegetable plots worldwide.
How To Grow
How to Grow Broad Beans
1. Choosing the Right Time
Broad beans are a cool-season crop and perform best when temperatures are between 7–20°C. Sow seeds in autumn for overwintering and an early crop, or in late winter to early spring for a main-season harvest. Avoid sowing into hot or waterlogged ground.
2. Choosing the Right Location
Select a spot in full sun or light partial shade with shelter from strong winds, as tall plants can be prone to wind damage. Broad beans are tolerant of a range of soils but thrive in fertile, well-drained ground. Avoid spots where legumes were grown the previous year.
3. Preparing the Soil
Dig in well-rotted compost or manure before planting to improve soil structure and moisture retention. Broad beans fix their own nitrogen, so additional nitrogen fertiliser is not needed and may promote leafy growth at the expense of pods.
4. Sowing Seeds
Sow seeds directly into the ground at a depth of 5–8 cm. Space seeds 20–25 cm apart within the row, with rows approximately 60 cm apart. Water well after sowing. Seeds can also be started in pots or root trainers and transplanted as young plants.
5. Watering
Water regularly, particularly during flowering and pod formation. Keep the soil consistently moist but never waterlogged. Mulching around plants helps retain moisture and suppress weeds.
6. Supporting Plants
Taller varieties benefit from support. Drive stakes at each end of the row and run lengths of string between them at regular intervals to keep plants upright and prevent wind damage.
7. Pinching Out
Once plants are in full flower and the lowest pods have begun to set, pinch out the top 5–8 cm of the growing tip. This deters blackfly (black bean aphid) and encourages the plant's energy to go into pod development.
8. Feeding
Broad beans generally require little feeding. If growth appears slow, a light application of a balanced, low-nitrogen fertiliser or compost tea can help. Avoid high-nitrogen feeds.
9. After Harvest
Once cropping is finished, cut the plants down to ground level and leave the roots in the soil. The nitrogen-rich root nodules will break down and enrich the soil for the next crop.
Harvesting
Harvesting Broad Beans
When to Harvest
Broad beans are typically ready to harvest 12–16 weeks after sowing, though this varies with variety and growing conditions. Check pods regularly once plants have finished flowering. Harvest when pods are plump, firm, and well filled — the beans inside should be roughly thumbnail to large-coin size for the best flavour and tenderness. Younger, smaller beans are sweeter; larger, older beans can become starchy and tough.
How to Harvest
Hold the main stem steady with one hand and use the other to firmly twist and pull the pod downwards, or cut the pod cleanly with scissors or a sharp knife. Avoid yanking pods, as this can uproot or damage the plant.
Harvest Regularly
Pick pods frequently — every few days once cropping begins — to encourage the plant to continue producing. Begin harvesting from the lowest pods on the stem, as these mature first and work upwards.
Young or Baby Beans
For a more delicate flavour and texture, harvest pods when they are still young and small enough to eat whole, lightly steamed or stir-fried. These are a gourmet treat and very different in character from mature beans.
Shelling and Using
Shell mature pods by pressing along the seam and removing the beans. For best flavour, cook promptly after picking. Fresh broad beans can be blanched and the outer grey skin slipped off to reveal the bright green bean inside — this is called double-podding and greatly improves texture.
Drying for Storage
To save beans for winter use, allow pods to dry and yellow on the plant, then harvest and dry the seeds indoors before storing in a cool, dry place. Dried broad beans store well for many months and can be used in soups and stews.
After the Harvest Season
Once plants have finished cropping, cut stems at ground level rather than pulling the entire plant. Leave roots in the soil to release stored nitrogen as they decompose, benefiting subsequent crops.
Common Problems
Common Problems with Broad Beans
Blackfly (Black Bean Aphid)
The most widespread pest of broad beans. Dense colonies of black aphids cluster on soft shoot tips and the undersides of leaves, weakening plants and reducing yield.
- Prevention: Pinch out the top 5–8 cm of growing tips once the first flowers appear — this removes the aphids' preferred feeding site and helps pod set.
- Control: Spray with a strong jet of water, insecticidal soap, or neem oil. Encourage natural predators such as ladybirds and lacewings.
Chocolate Spot (Botrytis fabae)
A fungal disease causing brown spots and streaks on leaves, stems, and pods. Severe infections can kill entire plants.
- Prevention: Ensure good air circulation by spacing plants adequately. Avoid excessive nitrogen fertilisation. Remove and dispose of affected material promptly.
- Control: Apply a copper-based fungicide at the first signs of infection.
Bean Weevil
Adult weevils notch the leaf margins in a characteristic scalloped pattern. Larvae feed on root nodules, reducing nitrogen fixation.
- Control: Seedlings are most vulnerable; protect young plants with fleece if weevils are prevalent.
Downy Mildew
Grey, downy patches appear on the undersides of leaves, often during cool, wet weather.
- Prevention: Improve air circulation and avoid overhead watering late in the day.
Rust
Orange-brown pustules develop on leaves and stems in humid conditions. Rarely fatal but reduces vigour.
- Control: Remove affected leaves promptly and destroy them. Rotate crops each year.
Root Rot
Caused by waterlogged or compacted soil. Plants wilt and collapse despite moist conditions.
- Prevention: Grow in well-drained soil; avoid overwatering. Rotate legumes every three to four years to reduce soilborne pathogens.
Pea and Bean Thrips
Tiny insects cause silvery mottling on pods and leaves. Damage is mainly cosmetic but can affect yield in hot, dry conditions.
- Control: Maintain soil moisture and remove crop debris after harvest.