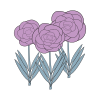
Carnations, known for their ruffled petals and clove-like fragrance, are one of the most popular and long-lasting cut flowers in the world. Belonging to the Dianthus genus, these blooms come in a wide range of colours, each symbolizing different sentiments—red for love, white for purity, and pink for a mother’s undying affection. Their elegant, frilly appearance and sturdy stems make them ideal for floral arrangements, bouquets, and boutonnieres. With a rich history dating back to ancient Greece and Rome, carnations have long been associated with admiration, fascination, and distinction. Whether used in celebrations, memorials, or everyday décor, carnations bring a timeless charm and vibrant beauty to any setting.
How To Grow
-
Choose the Right Spot:
Carnations love sunlight! Pick a location that gets at least 4–6 hours of direct sun daily. They also prefer well-draining soil—too much water can cause root rot.
-
Prepare the Soil:
Work compost or organic matter into the soil to improve drainage and nutrients. A slightly alkaline pH (around 6.7–7.0) is ideal.
-
Planting Seeds or Seedlings:
Seeds: Start indoors 6–8 weeks before the last frost. Sow them lightly, cover with a thin layer of soil, and keep moist. Transplant outdoors after the danger of frost passes.
Seedlings: Space about 6–12 inches apart, depending on the variety.
-
Watering:
Water deeply but infrequently. Let the soil dry a bit between waterings. Avoid getting water on the leaves to prevent disease.
-
Feeding:
Fertilize every 6–8 weeks with a balanced flower fertilizer. Don’t overdo it—too much nitrogen can reduce blooming.
-
Maintenance:
Deadhead spent blooms to encourage more flowers.
Support tall varieties with stakes to prevent drooping.
Trim back after flowering to maintain shape and promote new growth.
-
Pests & Problems:
Watch out for aphids, spider mites, and fungal diseases. Good air circulation and avoiding overhead watering can help prevent most issues.
How/When To Harvesting
-
Timing is Key
Harvest carnations when the blooms are just beginning to open—this is called the “paintbrush stage,” where petals are visible but not fully spread out. This ensures a longer vase life and prevents damage during handling.
-
Use Sharp, Clean Tools
Always use clean, sharp scissors or garden shears to avoid crushing the stem or spreading disease.
-
Cut in the Morning
The best time to harvest is early in the morning when the plants are well-hydrated and cool.
-
Cut at the Right Spot
Snip the stem just above a leaf node or side shoot—this encourages the plant to produce more flowers. Leave at least a few inches of stem on the plant for regrowth.
-
Remove Lower Leaves
Strip any leaves that would be submerged in water to prevent rotting once placed in a vase.
-
Place in Water Immediately
Put the cut flowers into clean, lukewarm water as soon as possible. Let them hydrate in a cool, shaded area before arranging them.


