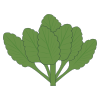
Collard Greens are a leafy green vegetable belonging to the Brassica family, which also includes cabbage, kale, and broccoli. Known for their large, dark green leaves and slightly bitter flavour, collard greens are a staple in Southern U.S. cuisine and are often slow-cooked with smoked meats, garlic, onions, and spices for a hearty, savoury dish. They are incredibly nutritious—rich in vitamins A, C, and K, calcium, and fibre—making them a favourite for both traditional comfort food and health-conscious diets. Collard greens can also be enjoyed sautéed, steamed, or used as a low-carb wrap alternative thanks to their sturdy texture.
How To Grow
-
Choose the Right Time
Collards are cool-season crops.
Plant in early spring (2–4 weeks before the last frost)
Or in late summer to early fall for a sweet, frost-kissed harvest
-
Pick a Sunny Spot
They need full sun—at least 6 hours a day.
Partial shade is okay, but growth might slow down.
-
Prepare the Soil
Collards love rich, well-drained soil with:
pH between 6.0 and 6.8
Plenty of compost or aged manure mixed in
-
Planting
Sow seeds ½ inch deep, spaced about 3 inches apart
Thin seedlings to 12–18 inches apart once they sprout
Or plant starter plants 18 inches apart in rows 2–3 feet apart
-
Water Regularly
Keep the soil consistently moist but not soggy.
About 1–1.5 inches of water per week is ideal.
-
Feed Them
Use a balanced fertilizer or one rich in nitrogen
Apply every 4–6 weeks to keep the leaves lush and green
-
Keep Pests Away
Watch for:
Aphids
Cabbage worms
Flea beetles
Neem oil or row covers can help protect your plants.
How/When To Harvesting
-
Wait Until They're Ready
You can start picking collard leaves when they’re about 10 inches long—big enough to eat but still tender.
This is usually 60–85 days after planting, depending on the variety.
-
Pick the Outer Leaves First
Always harvest the bottom, outer leaves first.
Leave the small, centre leaves alone—this is where the plant keeps growing.
Use a sharp knife or garden scissors, or gently twist the leaf stem near the base.
-
Harvest Often
Pick leaves every 5–7 days to encourage new growth.
Frequent harvesting keeps the plant from getting too woody or bitter.
-
After a Frost? Even Better
If you planted in the fall, a light frost will actually make the leaves sweeter and more tender.
-
Entire Plant Harvest (Optional)
If the plant is mature or you’re ready to clear the garden, you can cut the whole stalk at the base.
But remember: this ends the harvest for that plant.
After Harvesting:
Rinse off dirt or bugs
Store unwashed leaves in the fridge wrapped in a damp towel or plastic bag
Use within a week for best flavour