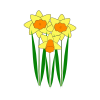
Daffodils, scientifically known as Narcissus, are vibrant and cheerful flowers that herald the arrival of spring. These perennial plants are part of the Amaryllidaceae family and are easily recognized by their trumpet-shaped blooms and long, slender green leaves. The flowers typically feature a central corona, often in the shape of a cup or trumpet, surrounded by six petal-like tepals. While yellow is the most common colour, daffodils also come in shades of white, orange, and even pink. Native to Europe and North Africa, daffodils thrive in temperate climates and are beloved for their hardiness and ability to naturalize in gardens. They are often planted as bulbs in the fall, blooming in early spring to brighten landscapes, parks, and woodland areas. Daffodils symbolize renewal and hope, making them a popular choice in floral arrangements and seasonal decorations. Beyond their beauty, daffodils are also notable for their cultural and literary significance, famously celebrated in William Wordsworth’s poem “I Wandered Lonely as a Cloud.” Their simplicity, resilience, and uplifting appearance make them a favourite among gardeners and flower enthusiasts worldwide.
How To Grow
Growing daffodils is a rewarding and straightforward process, perfect for adding a burst of colour to your garden in early spring. Here’s a step-by-step guide to help you grow these beautiful flowers:
-
Choose the Right Location Light: Daffodils thrive in full sun but can also grow in partial shade. Soil: Well-draining soil is essential to prevent bulb rot. They prefer slightly acidic to neutral soil (pH 6.0–7.0).
-
Planting the Bulbs When to Plant: Plant daffodil bulbs in the fall, 6–8 weeks before the first hard frost. This gives them time to establish roots before winter. How to Plant: Dig holes that are about 6–8 inches deep, depending on the bulb size. Place the bulbs pointed side up, spacing them 3–6 inches apart. Cover the bulbs with soil and gently press down to eliminate air pockets.
-
Watering Water the bulbs thoroughly after planting to help them settle. During the growing season, ensure the soil remains moist but not soggy.
-
Fertilizing Apply a balanced, low-nitrogen fertilizer when planting and again in early spring as shoots emerge. Avoid over-fertilizing, as it can encourage excessive foliage growth at the expense of flowers.
-
Care and Maintenance Mulch: Apply a layer of mulch after planting to retain moisture and protect the bulbs from freezing temperatures. Deadheading: Once the flowers fade, remove spent blooms to prevent the plant from diverting energy into seed production. Foliage: Allow the leaves to yellow and wither naturally after flowering. This process helps the bulbs store energy for next year’s growth.
-
Overwintering Daffodils are hardy and generally don’t require digging up in winter. However, in extremely cold climates, an additional layer of mulch may provide extra protection.
-
Dividing Bulbs Every 3–5 years, if your daffodils become overcrowded or stop blooming as profusely, dig up the bulbs after the foliage has died back. Separate and replant them in fresh soil.
-
Pest and Disease Management Daffodils are resistant to most pests and diseases. However, watch out for bulb rot caused by overly wet soil and keep an eye out for slugs or snails in the early spring.
Harvesting
Harvesting daffodils correctly ensures that you get the best-looking flowers while also preserving the health of the plant for future growth. Here’s a step-by-step guide to harvesting daffodils:
-
Choose the Right Time For Best Blooms: Harvest daffodils when the flower buds are fully developed but still closed. This is often referred to as the "gooseneck stage," where the buds are just beginning to show colour and are slightly bent downward. Avoid Overmature Flowers: Harvesting open or fully bloomed daffodils reduces their vase life and may cause the petals to bruise during handling.
-
Tools You’ll Need You don’t need special tools to harvest daffodils. Your hands are often sufficient, but you can use a clean, sharp knife or garden scissors for precise cuts.
-
How to Harvest By Hand: Grip the stem near the base and pull it upward with a slight twist. This removes the stem cleanly from the plant. Using Tools: If you prefer to cut the stems, make the cut about 1 inch above the base of the plant. Ensure your tools are clean to avoid spreading any potential diseases.
-
Condition the Flowers Handle Carefully: Daffodil stems secrete a sap that can irritate the skin and shorten the lifespan of other flowers in mixed arrangements. Wear gloves if handling large quantities. Separate for 6–12 Hours: Place the freshly cut daffodils in a separate bucket of water for several hours to allow the sap to stop flowing. After conditioning, they can be safely added to mixed bouquets.
-
Preserve the Plant Leave the Foliage Intact: Do not cut or remove the leaves when harvesting flowers. The foliage is essential for photosynthesis, helping the bulb store energy for next year’s blooms.
-
Storage Tips Keep Cool: Place the harvested flowers in a cool location or refrigerator (away from fruit like apples, which release ethylene gas that can age flowers prematurely). Change Water Regularly: If keeping the daffodils in a vase, replace the water every 2–3 days to maximize their vase life.
-
Optional Tips for Longevity To extend the blooms, trim the stems at an angle before arranging them in a vase. Use fresh, clean water, and avoid placing the arrangement in direct sunlight or near heat sources.
Common Problems
Common Problems with Daffodils
Bulb Rot
One of the most frequent issues is bulb rot, caused by Fusarium fungi or bacterial rots. This occurs when bulbs sit in waterlogged or poorly drained soil. Symptoms include soft, discoloured bulbs and yellowing foliage before flowering time. Prevent rot by planting in well-drained soil and avoiding overwatering.
Narcissus Basal Rot
A specific fungal disease (Fusarium oxysporum) that attacks the base of the bulb, causing browning and decay from the bottom up. Infected bulbs should be discarded rather than replanted. Rotate planting areas every few years to reduce soil-borne pathogen build-up.
Narcissus Fly
The large narcissus fly (Merodon equestris) lays eggs near the neck of the bulb in late spring. The larvae burrow into the bulb and eat the interior, leaving a hollow or rotten core. Affected plants either fail to emerge or produce weak, grassy foliage. Covering the soil surface after flowering can help deter egg-laying adults.
Slugs and Snails
Emerging shoots in early spring are vulnerable to slug and snail damage. Use organic slug pellets, copper barriers, or nematode treatments to protect young growth.
Narcissus Nematode
Stem and bulb nematodes (Ditylenchus dipsaci) cause distorted, stunted foliage and soft, brown internal rings visible when bulbs are cut open. There is no chemical cure — infested bulbs must be destroyed and the area left unplanted with bulbs for several years.
Viruses
Daffodils can be affected by various mosaic viruses, often spread by aphids. Symptoms include yellow streaking or mottling on leaves and reduced vigour. Remove and destroy affected plants and control aphid populations to limit spread.
Blindness (Failure to Flower)
Plants that produce only foliage without flowers are described as 'blind.' This is often caused by overcrowded bulbs, inadequate sunlight, bulbs planted too shallowly, or premature cutting of foliage in previous years. Dividing congested clumps every 3–5 years and allowing foliage to die back naturally will help restore flowering.