Often described as the "cool cousin" of the herb world, Dill (Anethum graveolens) is a versatile, feathery annual that is as beautiful in a garden as it is essential in a kitchen. It belongs to the celery family (Apiaceae) and is famous for its distinct, refreshing aroma.
Key Characteristics
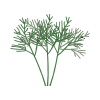
Appearance: Dill is easily recognized by its slender, hollow stems and delicate, thread-like green leaves that resemble fern fronds.
Flowers: In mid-summer, the plant produces flat-topped clusters of tiny yellow flowers known as umbels. These aren't just pretty; they are a magnet for beneficial insects like honeybees and swallowtail butterflies.
Height: Depending on the variety, it can grow anywhere from 45 cm to 1 meter (1.5 to 3 feet) tall.
Flavour Profile
Dill offers a unique flavour that is difficult to substitute.
The Leaves (Dill Weed): Bright, sweet, and grassy with a hint of anise (liquorice) and lemon.
The Seeds: More pungent and bitter, with a flavour profile closer to caraway.
Common Uses
Dill is a global superstar in culinary traditions, particularly in Scandinavian, Central European, and Middle Eastern cuisines.
Part Used
Common Applications
Fresh Leaves
Garnishing salmon, flavouring yogurt dips (like Tzatziki), and elevating potato salads.
Seeds
Used primarily in pickling brines, bread baking, and hearty stews.
Flowers Often tucked into pickle jars for both flavour and aesthetic appeal.
Quick Growing Tips
If you're thinking of adding this to your herb garden, keep these three things in mind:
Sunlight: It craves full sun (at least 6–8 hours a day).Stability: Because it is tall and wispy, it can blow over in high winds; it often appreciates a little staking or being planted in a sheltered spot.
Taproot: Dill has a long central taproot and hates being moved. It’s best to sow the seeds directly into the soil rather than starting them in pots and transplanting.
Pro Tip: If you want a steady supply of fresh leaves all summer, sow a new batch of seeds every few weeks, as the plant "bolts" (goes to seed) fairly quickly in hot weather.
How To Grow
Growing dill is often described by gardeners as "set it and forget it." Because it grows so rapidly, you can go from seed to harvest in about 6 to 8 weeks.
Follow these steps to ensure a healthy, fragrant crop.
-
Preparation
Before you drop a single seed in the ground, make sure you have the right environment.
When to Plant: Sow seeds in the spring after the danger of frost has passed.
Pick the Spot: Choose a location with full sun (at least 6–8 hours).
The "No-Move" Rule: Dill has a deep taproot and does not transplant well. Always sow seeds directly where you want them to grow rather than starting them in small pods.
-
Planting Steps
Prepare the Soil: Lightly rake the soil to loosen it. It doesn't need to be rich, but it must drain well.
Sow the Seeds: Sow seeds about 0.5 cm (1/4 inch) deep.
Spacing: Aim for rows about 30 cm (12 inches) apart.
Water Gently: Use a light mist so you don't wash the tiny seeds away.
-
Maintenance
Thinning: Once the seedlings are about 5 cm (2 inches) tall, pull out the weakest ones so the remaining plants are 20–25 cm apart. This prevents crowding and mould.
Watering: Keep the soil moist but not waterlogged. Once the plant is established, it’s quite hardy.
Staking: If your dill gets very tall (some reach 1 meter) and you live in a windy area, tie the main stem loosely to a bamboo stake.
-
The Secret to a Constant Supply
Dill is an annual that matures quickly and then dies off once it flowers. To avoid running out:
Succession Planting: Sow a small new patch of seeds every 2 to 3 weeks through mid-summer.
Preventing "Bolting": If you only want the leaves, pinch off the yellow flower heads as soon as they appear. This forces the plant to keep growing foliage.
How/When To Harvesting
Harvesting dill is a "choose your own adventure" task—the method depends entirely on whether you want the delicate green leaves (dill weed) or the pungent seeds.
Here is how to get the most out of your harvest:
-
Harvesting the Leaves (Dill Weed)
The leaves have the best flavour just before the flowers open. Once the plant blooms, the foliage can become slightly bitter.
When to start: You can begin harvesting as soon as the plant has 4 to 5 leaves (usually when it's about 15–20 cm tall).
How to cut: Use sharp scissors or garden snips. You can either pinch off individual leaflets or cut entire stems.
The "Rule of Thirds": Never harvest more than one-third of the plant at a time if you want it to keep growing. This ensures the plant has enough energy to regenerate.
-
Harvesting the Flowers
If you are making "refrigerator pickles," the yellow flower heads (umbels) provide a beautiful look and a concentrated burst of flavour.
When: Snip the stems as soon as the yellow flowers have fully opened but before they start to turn brown.
-
Harvesting the Seeds
If you want seeds for baking or pickling brines, you have to be patient and let the plant finish its life cycle.
Step 1: Wait for browning. Let the flowers fade. The green seeds will eventually turn flat and brown.
Step 2: The Bag Method. Cut the entire flower head with a bit of stem attached. Place the head upside down inside a paper bag and tie the opening around the stem with a rubber band or string.
Step 3: Drying. Hang the bag in a cool, dry place for about 1–2 weeks.
Step 4: Collecting. Shake the bag vigorously. The dry seeds will fall to the bottom, separated from the stems.