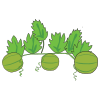
Galia melon, also known as Sarda in some regions, is a type of melon similar to cantaloupe but distinguished by its unique characteristics. It was first developed in Israel by crossing a cantaloupe with a honeydew melon. This hybrid fruit is renowned for its smooth, pale yellow to green exterior and a succulent, creamy flesh that is typically a deeper lime green.
Galia melons are relatively small, usually weighing between one to three pounds, making them a convenient size for consumption. The flesh of the Galia melon is not only strikingly sweet, often with tropical nuances such as banana and pineapple, but it also possesses a perfumed, aromatic quality that is quite intense compared to other melons.
This melon variety ripens after detaching from the stem, indicated by a distinctive sweet fragrance and slight softening at the blossom end. It is a popular choice for fresh eating, particularly as a refreshing summer treat, and is also delightful in salads, smoothies, or as a complement to savoury dishes. The nutritional profile of Galia melon includes being low in calories while providing a good source of vitamins A and C, making it a healthful addition to any diet.
How To Grow
Growing Galia melons can be a rewarding endeavour for gardeners looking to cultivate something both delicious and slightly exotic. Here’s a comprehensive guide on how to grow Galia melons, from seed selection to harvest:
-
Selecting Seeds
Choose high-quality seeds from a reputable supplier to ensure good germination rates and plant health. You might also consider purchasing young plants from a local nursery if you want to skip the seed-starting phase.
-
Starting Seeds Indoors
Begin by sowing seeds indoors about 4-6 weeks before the last expected frost. Plant seeds in peat pots or small containers using a well-draining seed starting mix.
Keep the soil moist and at a temperature of around 75-80°F (24-27°C) to encourage germination.
-
Choosing a Site
Galia melons thrive in full sun and require well-drained soil rich in organic matter. Choose a location that receives at least 6-8 hours of direct sunlight per day.
Improve your soil by adding compost or well-rotted manure to increase nutrients and enhance soil structure.
-
Transplanting
Once all risk of frost has passed and the seedlings have developed a few true leaves, transplant them outdoors. Harden off the plants by gradually exposing them to outdoor conditions over a week to prevent shock.
Space the plants about 2-3 feet apart in rows, allowing about 6 feet between rows to accommodate their growth.
-
Watering and Feeding
Water the plants deeply but infrequently to encourage deep root growth. Ensure the soil is moist but not waterlogged.
Use a balanced fertilizer every 4-6 weeks to provide necessary nutrients, especially once the plants start flowering and setting fruit.
-
Support and Maintenance
Consider using trellises or supports for your Galia melons, as this can help reduce disease exposure and improve air circulation around the plants.
Regularly check for pests such as aphids and cucumber beetles, and manage them using appropriate methods.
-
Pollination
Galia melons require pollination to produce fruit. If you don’t have many bees or other pollinators in your area, you may need to hand-pollinate flowers. Gently transfer pollen from male flowers to female flowers using a small paintbrush.
How/When To Harvesting
Harvesting Galia melons at the right time is crucial for enjoying their best flavour and texture. Here’s a step-by-step guide on how to correctly harvest Galia melons:
- Watch for Signs of Maturity
Colour Change: The skin of the Galia melon changes from green to a more yellowish hue as it ripens.
Fragrance: Ripe Galia melons emit a sweet, musky aroma at the blossom end (opposite the stem).
Softening: The blossom end of the melon should yield slightly to gentle pressure when it’s ripe.
- Check the Stem
Stem Shrinkage: Look for the stem to begin shrinking and drying out as the melon matures.
Slip Stage: Galia melons are considered "full slip," meaning the melon is ready to harvest when the stem can be easily pulled away from the fruit with little resistance. If the melon falls off the vine on its own, it’s a sign that it’s perfectly ripe.
- Harvesting
Gentle Handling: When the melon shows signs of maturity, gently lift it to check if the stem detaches easily. If it does, the melon is ready to harvest.
Use Pruning Shears: If the stem does not detach easily with a gentle tug, use a pair of clean pruning shears to cut the stem close to the melon to avoid damaging the plant and the fruit.
- Post-Harvest Handling
Inspect for Damage: Check the melon for any bruises, cuts, or insect damage. Handle it gently to avoid any further damage.
Curing: Although not necessary, some gardeners let the melons sit at room temperature for a couple of days to enhance their sweetness further.
Storage: Store Galia melons at room temperature if they will be consumed soon. For longer storage, keep them in the refrigerator where they can last for about a week.
- Taste Test
After harvesting, cut open a melon to inspect its internal colour and enjoy a taste test. The flesh should be pale green, soft, and sweet. If it’s not as sweet as expected, consider leaving the next melons on the vine a bit longer.
- Regular Monitoring
During the peak of the season, check your melons every other day, as they can rapidly progress from under ripe to overripe, especially in very hot weather.


