Garlic (Allium sativum) is the pungent, soulful powerhouse of the kitchen. While it’s technically a vegetable from the Allium family (making it a close relative of onions, leeks, and shallots), it is almost universally treated as a seasoning or "aromatic" due to its intense flavour.
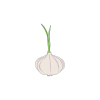
The Anatomy of a Bulb
A single head of garlic is a masterclass in natural packaging.
The Cloves: Each bulb is made up of several individual segments called cloves, each wrapped in its own papery skin.
The Wrapper: The entire cluster is held together by several layers of white, purple-streaked, or pinkish parchment-like skin.
The Scape: In certain varieties, the plant sends up a curly, edible green stalk in early summer that tastes like a cross between garlic and asparagus.
The Two Main Families
Not all garlic is created equal. Depending on your climate and taste, you’ll likely grow or buy one of these two types:
Type
Characteristics
Best For...
Hard neck Produces a woody central stem and curly "scapes." Fewer, larger cloves with complex, spicy flavours.
Colder climates; gourmet cooking.
Soft neck No central woody stem (the kind you see in "braids"). More cloves per bulb, usually milder.
Longer storage; warmer climates.
The "Magic" of Allicin
Garlic doesn't actually smell "garlicky" until you mess with it. When you crush, chop, or mince a clove, a chemical reaction occurs between two compounds (alliin and alliinase) to create allicin.
The Rule: The more you damage the cells, the stronger the flavour. Sliced garlic is mellow; crushed garlic is a punch to the senses.
Cooking Tip: If you want the health benefits of allicin, let your chopped garlic sit on the cutting board for 10 minutes before heating it—this allows the compound to fully develop and stabilize.
Growing "The Patient Crop"
Garlic is one of the most rewarding things to grow because it does its work while you sleep.
The Cycle: You plant it in the autumn (around October or November). It needs the winter chill (vernalization) to trigger the bulb to split into individual cloves.
The Harvest: It sits in the ground for nearly 9 months, emerging in mid-summer as a fully formed bulb.
Fun Fact: Garlic has been used as currency, medicine, and protection against the supernatural for over 5,000 years. During the construction of the Pyramids, Egyptian workers were reportedly given garlic to provide them with the strength to move heavy stones.
How To Grow
Growing garlic is one of the most satisfying "set it and forget it" projects in the garden. Because it needs a period of cold to develop its cloves—a process called vernalization—it is best planted in late autumn or early winter.
- Choosing Your Garlic
Don't use supermarket garlic. Most garlic sold in shops is treated with growth inhibitors to prevent sprouting and may carry diseases.
Buy "certified virus-free" seed garlic from a garden center or specialist.
Choose Hard neck if you live in a cold area (tastier, produces scapes).
Choose Soft neck if you have mild winters (stores longer, easier to braid).
- When and Where to Plant
Timing: Plant between October and January. The saying goes: "Plant on the shortest day (Winter Solstice), harvest on the longest (Summer Solstice)."Site: Garlic needs full sun and well-drained soil. It hates sitting in water during the winter, which causes rot. If your soil is heavy clay, plant it in raised beds or pots.
- How to Plant
Break the Bulb: Just before planting, carefully break the garlic head into individual cloves. Leave the papery skin on each clove.
Select the Best: Only plant the largest, healthiest-looking cloves. Use the tiny ones for cooking.
The Depth: Dig a hole about 5 cm (2 inches) deep.
Orientation: Place the clove with the pointy end up and the flat, blunt end (the root plate) down.
Spacing: Space cloves 15 cm (6 inches) apart, in rows 30 cm (12 inches) apart.
- Maintenance
Garlic is low-maintenance, but it doesn't like competition.
Weeding: This is the most important job. Garlic has shallow roots and thin leaves that don't shade out weeds. Keep the area clear so the weeds don't "strangle" the bulbs.
Watering: Water during dry spells in spring and early summer. Stop watering entirely about 2–3 weeks before you harvest (when the leaves start to turn yellow).
Scapes (Hard necks only): In June, your garlic might grow a curly flower stalk called a "scape." Cut this off. It forces the plant to put its energy into the bulb rather than the flower. (And yes, scapes are delicious sautéed in butter!)
- Troubleshooting
Rust Orange spots on leaves. Common in damp springs. It rarely kills the bulb; just harvest slightly early if it gets bad.
Birds
Birds often pull up newly planted cloves. Cover with a net or fleece until the green shoots are a few inches tall.
Single Bulbs
Not enough cold weather.
If the winter was too warm, you might get "solo" garlic (one big onion-like bulb). It's still edible!
Pro-Tip: Garlic is an amazing companion plant. Its strong scent helps deter pests from roses, carrots, and tomatoes. Just don't plant it near peas or beans, as it can stunt their growth.
How/When To Harvesting
Harvesting garlic is all about timing. If you pull it too early, the cloves will be tiny and under developed; if you wait too long, the protective papery skins will burst open in the soil, leaving the cloves exposed to rot and shortening their shelf life.
Here is how to get it exactly right.1. Watch the Leaves (The "Rule of Thirds")Unlike onions, where the tops flop over when ready, garlic leaves stay upright but begin to die back from the bottom up.
The Signal: Start looking for a harvest window when the bottom two or three leaves have turned brown and withered, but the top leaves are still green.
The Math: Aim for a ratio of about 1/3 brown to 2/3 green. Each green leaf represents a layer of protective skin around the bulb. If you wait until the whole plant is brown, you’ll have no "wrapper" left.
- The "Pre-Harvest" Test
Before you dig up the whole row, do a manual check:
Carefully scrape away the soil around the base of one or two bulbs.
Feel the bulb. You should be able to feel the individual "bumps" of the cloves beneath the skin.
If the bulb feels like one solid, smooth mass (like an onion), it needs another week or two.
- The Extraction
Garlic bulbs are firmly anchored by strong roots. Never pull garlic by the stem, as it can snap off and leave the bulb to rot in the ground.
Loosen the Soil: Use a garden fork or a trowel to gently pry up the soil about 4–5 inches away from the bulb.
Lift: Once the soil is loose, lift the bulb from underneath while gently guiding it out by the neck.
Shake: Gently shake off the loose dirt. Do not knock the bulbs against each other or a shovel, as they bruise easily at this stage.
- The Curing Process (The Most Important Step)"Curing" is the process of drying the outer skins so the garlic can be stored for months. Without this, your harvest will mould within weeks.
Avoid Direct Sun: Don't leave the bulbs on the hot soil for more than an hour or two; they can actually "sunburn" and cook.
Find a Dry Spot: Move them to a shaded, well-ventilated area (a porch, garage, or shed).Lay or Hang: Either lay them out in a single layer on a rack or tie them in small bundles and hang them with the leaves still attached.
Wait: Let them cure for 2–4 weeks. You’ll know they are ready when the outer wrappers are dry and crispy, and the roots are brittle and hard.
- Trimming and Storage
Once cured, you can clean them up for the pantry:
The Trim: Cut the roots to about 1 cm and trim the stalks to about 2 cm (unless you are braiding Soft neck garlic).
The "Clean": Rub off the outermost layer of dirty skin with your thumb to reveal the clean, white/purple skin underneath. Do not wash them with water.
The Location: Store in a cool, dark, dry place with plenty of air circulation.
Variety Type
Expected Shelf Life
Hardneck 4–6 months
Softneck 9–12 months
Pro-Tip: Save your biggest, best-looking bulbs from this harvest! You can use those cloves as your "seed garlic" to plant again this coming autumn.