Jerusalem Artichoke (Sunchoke / Earth Apple)
Helianthus tuberosus is one of the most productive and self-sufficient plants you can grow in a kitchen garden. Despite the name, it has no connection to Jerusalem and is not related to the globe artichoke — it is actually a species of sunflower, grown primarily for its knobby, ginger-like underground tubers.
Appearance
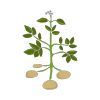
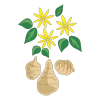
Above ground, plants reach an impressive 2–3 metres in height, producing bright yellow, sunflower-like blooms in late summer. Below ground, the tubers range in colour from pale tan to rosy pink or purple, with irregular, knuckled shapes and crisp white flesh.
Flavour
Raw tubers are crunchy, juicy, and mildly nutty. When cooked, they become tender and creamy, with an earthy sweetness that recalls the heart of a globe artichoke. Flavour improves noticeably after exposure to frost, which converts some of the inulin content into fructose.
Nutritional Note
Jerusalem artichokes are rich in inulin, a prebiotic fibre. This is beneficial for gut health but can cause digestive discomfort in some people, especially when consumed in large quantities. Cooking thoroughly and introducing them gradually into the diet helps minimise this effect.
Growing Character
These are vigorous, almost unstoppable plants. They tolerate poor soils, drought, and cold, and will return year after year from any tuber fragments left in the ground. Choose their location carefully — once established, they are difficult to remove entirely.
How To Grow
How to Grow Jerusalem Artichokes
Jerusalem artichokes are among the easiest crops to establish. The main challenge is not getting them to grow — it is managing their enthusiasm.
Choosing a Location
- Sun: Prefer full sun but tolerate partial shade. Fewer tubers in shadier spots.
- Soil: Adaptable to most soils, including poor or clay-heavy ground, but best in loose, well-drained soil that tubers can expand into.
- Wind: Tall stems act as wind sails — plant against a fence or be prepared to stake. Avoid positions that shade other valued crops.
- Containment: Choose the location permanently or install root barriers (vertical boards or buried edging at least 40 cm deep) to prevent unwanted spread.
Planting
Jerusalem artichokes are grown from tubers, not seeds — similar to potatoes.
- Timing: Plant in early to mid spring, as soon as the soil is workable. Tubers tolerate light frosts.
- Tuber selection: Choose firm, healthy tubers with visible buds (eyes). Small tubers can be planted whole; larger ones can be cut into sections, each with at least two eyes.
- Depth: Plant 10–15 cm deep.
- Spacing: Space tubers 40 cm apart in rows 90 cm apart to allow for their spreading root systems and tall canopy.
Care Through the Season
- Watering: Water during prolonged dry spells, especially in the first few weeks. Once established, they are highly drought-tolerant.
- Feeding: Minimal fertiliser needed. A light application of compost at planting time is sufficient. Avoid excess nitrogen, which encourages leafy growth at the expense of tubers.
- Staking: In exposed positions, stake stems or tie them to a support once they reach 1 metre tall.
- Earthing up: Mounding soil around the base (as with potatoes) can improve tuber development and stability.
Flowering
Bright yellow flowers appear in late summer. They are attractive but can be removed to redirect energy into tubers — this is optional.
End of Season
Once the foliage dies back and turns brown in autumn, cut the stalks down to 10–15 cm above ground level. The tubers are then ready to harvest as needed through winter.
Harvesting
Harvesting Jerusalem Artichokes
Timing
Patience pays with Jerusalem artichokes. Although the plants finish flowering in late summer, the tubers are not at their best until after the first hard frosts of autumn. Cold temperatures trigger a conversion of inulin into fructose, making the tubers noticeably sweeter, nuttier, and gentler on digestion.
Wait for: Stalks to turn fully brown and brittle — this signals that the plant has finished drawing energy down into the tubers.
Preparation
Before digging, cut the dead stalks down to 10–15 cm above ground. Leaving a short stub helps you identify the centre of the root mass and avoid accidentally cutting tubers with your digging tool.
Digging Technique
- Use a garden fork rather than a spade to reduce the risk of slicing tubers.
- Begin digging 20–25 cm away from the base of the stalk and work inward in a circle.
- Gently lever the root ball upward once the surrounding soil is loose.
- Sift through the loosened soil with your fingers or a hand rake — tubers are expert at hiding.
Harvest-as-You-Go
A key advantage of this crop is that tubers can be left in the ground throughout winter and dug up as needed. This is often the best storage method, as fresh tubers have better texture than those stored indoors.
Storage
Jerusalem artichokes have thin, delicate skin and do not store as readily as potatoes.
- Do not wash tubers until just before use — soil helps protect the skin.
- Short-term: Store in a perforated bag in the refrigerator crisper drawer for up to 2 weeks.
- Long-term: Pack in a box of damp sand or peat moss in a cool, dark location. They can last 2–3 months this way.
Controlling Regrowth
Every tuber fragment left in the soil will produce a new plant the following spring. After harvest:
- Sift the soil thoroughly if you wish to clear the bed completely.
- Deliberately leave 2–3 small tubers in the ground if you want the bed to continue naturally — they will provide next year's crop with no effort at all.
Common Problems
Common Problems with Jerusalem Artichokes
Jerusalem artichokes are remarkably trouble-free compared to most vegetables, but a few issues are worth knowing about.
Invasiveness
This is the most significant 'problem' for most gardeners. Any tuber fragment left in the ground will regrow. A single season's planting can become a permanent bed if not carefully managed. Prevention: Use root barriers, dedicate a permanent bed, or commit to thorough annual harvesting.
Slug and Snail Damage
Young shoots emerging in spring can be targeted by slugs and snails. Management: Apply organic slug pellets, set traps, or use physical barriers around new growth until shoots are well established.
Sclerotinia (White Mould)
In wet conditions, Sclerotinia sclerotiorum can infect stems near the soil line, causing a white fluffy mould and stem collapse. Management: Improve air circulation by not overcrowding plants. Remove and dispose of infected material promptly. Avoid overwatering.
Powdery Mildew
Late in the season, leaves may develop a white powdery coating — particularly in dry conditions with high humidity. This rarely affects tuber quality significantly but can weaken the plant if severe. Management: Ensure adequate spacing for airflow; remove affected leaves.
Aphids
Clusters of aphids can colonise stems and young growth. They are rarely a serious problem on this vigorous plant but may act as vectors for viral diseases. Management: Encourage natural predators, or knock aphids off with a strong water spray. Avoid excess nitrogen feeding, which produces soft growth that attracts aphids.
Digestive Discomfort
Not a growing problem, but worth noting: the high inulin content in tubers can cause bloating and flatulence, particularly when eaten raw or in large portions. Cooking thoroughly and eating in modest quantities reduces this effect.