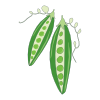
Garden Pea (Pisum sativum)
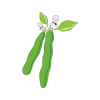
The garden pea is the quintessential cool-season vegetable — a vibrant, fresh crop that signals the arrival of spring. Whether snapped straight from the vine or enjoyed as part of a classic dish, peas are a staple of both the kitchen garden and the kitchen table.
Types of Pea
- Shelling peas (garden peas): Grown for the round, tender seeds inside. Pods are fibrous and not eaten.
- Mangetout (snow peas): Flat pods harvested young and eaten whole, before the seeds develop.
- Sugar snap peas: A cross between shelling and mangetout types — plump, sweet pods eaten whole.
What to Expect
Peas are climbing legumes that use thin, curling tendrils to attach themselves to supports. Most varieties reach 60–180 cm in height, though dwarf bush types exist for compact spaces. Before pods form, plants produce attractive butterfly-shaped flowers in white, pink, or purple — depending on the variety.
Flavour and Nutrition
Freshly picked garden peas are famously sweet. This is because sugars begin converting to starch the moment a pod is removed from the plant, which is why home-grown peas taste far superior to those that have spent time in transit or storage. Peas are also nutritionally impressive, offering significant protein, dietary fibre, and vitamins A, C, and K.
Garden Value
Beyond their flavour, peas are valuable as a soil-improving crop. Like all legumes, they form a symbiotic relationship with nitrogen-fixing bacteria in the soil, enriching the ground for subsequent crops. Their relatively short growing season also makes them ideal predecessors for summer vegetables in a well-planned rotation.
How To Grow
How to Grow Peas
Timing
Peas are a cool-season crop that grows best when temperatures remain between 10–20°C. They can tolerate light frost, making them one of the first vegetables to sow each year. Direct sow outdoors as soon as the soil is workable and has reached at least 5°C. A second sowing in late summer can produce an autumn harvest in mild climates.
Site and Soil
- Sunlight: Full sun is ideal, though peas tolerate partial shade better than most vegetables.
- Soil: Well-drained, moisture-retentive soil with plenty of organic matter. Avoid heavy, compacted, or waterlogged conditions, which cause seed rot.
- Soil pH: Aim for a slightly acidic to neutral pH of 6.0–7.5.
- Avoid: Freshly manured beds, which promote excessive leafy growth at the expense of pods.
Sowing
Peas are best sown directly into the ground, as they dislike root disturbance. However, they can be started in deep modules or cardboard tubes to transplant carefully.
- Prepare a flat-bottomed trench or individual holes approximately 4 cm deep.
- Sow seeds 5–7 cm apart within the row.
- Space rows 45–60 cm apart (closer rows can be made if using a double-row system on either side of a central support).
- Cover with soil and water gently.
- Pre-soaking seeds for 12–24 hours before sowing can speed up germination.
Support
Erect support structures at the time of sowing, before seedlings emerge. Options include:
- Pea netting stretched between stakes
- Twiggy pea sticks (brushwood) pushed into the ground
- Bamboo canes with horizontal strings
Even dwarf varieties benefit from some support to keep pods off the soil.
Watering and Feeding
- Water regularly, particularly during dry spells.
- Critical watering periods: when plants are flowering and when pods are swelling.
- Avoid overwatering before flowering, which promotes foliage rather than pods.
- Peas fix their own nitrogen, so feeding is rarely needed. Avoid high-nitrogen fertilisers.
- Mulch around the base of plants to retain moisture and keep roots cool.
Succession Sowing
Make small sowings every 2–3 weeks to extend the harvest window rather than sowing a large batch all at once.
Harvesting
Harvesting Peas
When to Harvest
Peas are ready to harvest approximately 11–16 weeks from sowing, depending on the variety and growing conditions. Begin checking pods regularly once plants are in full flower, as the window from perfect to overripe can be just a day or two.
Signs of readiness:
- Pods are bright green, firm, and glossy
- Individual peas are visible as distinct rounded bumps when you run your fingers along the pod
- Pods feel full and firm when gently squeezed — no soft or air-filled sections
- Pods at the base of the plant ripen first; work upwards as the season progresses
Signs of overripeness:
- Pods appear dull, pale, or yellowish
- Seeds feel very hard or the pod looks shrunken and tight
- Flavour becomes starchy rather than sweet
How to Harvest
Pea vines are fragile and have shallow roots. Always use a two-handed technique:
- Hold the main stem firmly just above the pod attachment point with one hand.
- Use the other hand to pinch or snap the pod cleanly at the stem, or use small scissors or snips.
- Never pull sharply with one hand — this risks uprooting the entire plant or snapping the vine.
Harvest in the early morning when sugar content is highest and pods are at their freshest.
Shelling Peas
- Snap off the stem end of the pod.
- Pull the stem downward along the inner (concave) seam to unzip the pod.
- Run your thumb along the inside to push the peas into a bowl.
After Harvest
Peas begin converting sugars to starch immediately after picking, so use them as soon as possible for the best flavour.
- Immediate use: Eat raw or cook within a few hours of picking.
- Short-term storage: Refrigerate in a breathable bag for up to 5 days.
- Freezing: Blanch shelled peas in boiling water for 90 seconds, plunge into an ice bath, drain, and freeze. Home-frozen peas retain excellent flavour for up to 12 months.
Encouraging Continued Production
Regular harvesting is essential — leaving pods on the plant signals it to stop producing. Pick every 1–2 days at peak season to maximise yield. Once plants are exhausted, cut the stems at ground level and leave the nitrogen-rich roots in the soil to benefit the next crop.
Common Problems
Common Pea Problems
Pests
Pea Moth (Cydia nigricana) Larvae tunnel into pods and feed on developing seeds. Look for small holes in pods and caterpillars inside. Net plants during flowering to prevent egg-laying, or time sowings to avoid the main flight period.
Pea and Bean Weevil (Sitona lineatus) Adults notch the leaf margins in a characteristic U-shape. Rarely fatal to established plants but can damage seedlings significantly. Encourage natural predators and avoid sowing into cold, slow-draining soils where seedlings take too long to establish.
Aphids (Blackfly and Greenfly) Colonies cluster on shoot tips, distorting growth and weakening plants. They also vector viral diseases. Pinch out infested shoot tips, encourage ladybirds and lacewings, or use a strong water jet to dislodge them.
Mice and Birds Seeds and seedlings are attractive to mice and pigeons. Use humane mouse traps around sowing areas and cover rows with netting or chicken wire immediately after sowing.
Diseases
Powdery Mildew (Erysiphe pisi) A white, powdery coating appears on leaves, stems, and pods — most prevalent in warm, dry weather with cool nights. Improve air circulation by not overcrowding plants, choose resistant varieties, and water at the base to keep foliage dry.
Pea Root Rot / Damping Off (Fusarium spp., Pythium spp.) Seeds fail to emerge or seedlings collapse at soil level. Caused by cold, waterlogged soils. Always sow into well-drained, workable soil and avoid overwatering in the early stages.
Fusarium Wilt Plants yellow and wilt despite adequate moisture. A soilborne fungal disease that persists for years. Practice a minimum 4-year crop rotation and select wilt-resistant varieties where available.
Downy Mildew (Peronospora viciae) Yellow patches appear on the upper leaf surface with a grey-purple mould underneath. Favoured by cool, humid, poorly ventilated conditions. Thin plants for airflow and remove affected material promptly.
Disorders
Failure to Germinate Caused by sowing into cold or waterlogged soil below 5°C. Pre-soaking seeds for 12–24 hours and waiting for soil temperatures to rise improves germination rates.
Poor Pod Set Often due to heat stress — temperatures above 25°C during flowering can cause blossom drop. Time sowings to ensure flowering occurs during cooler parts of the season.
Prevention Tips
- Practise crop rotation (minimum 4 years) to break soilborne disease cycles.
- Always provide support structures at planting time.
- Harvest regularly to encourage continued pod production and prevent plants from exhausting themselves.