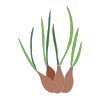
The shallot (Allium cepa var. aggregatum) is a member of the onion family prized for its delicate, complex flavour — sweeter and milder than a standard onion, with a subtle hint of garlic. Beneath its coppery, papery skin, a single planted bulb divides into a cluster of two to eight individual cloves, making it a rewarding and productive crop to grow.
Unlike onions, shallots break down quickly when cooked, melting into a buttery, almost jam-like consistency that makes them ideal for pan sauces, vinaigrettes, and slow-cooked dishes. They can also be used raw, thinly sliced in salads or pickled, where their relative mildness makes them far more palatable than raw onion.
Shallots can be grown from small immature bulbs called sets — the most popular method — or from seed. Growing from sets is faster, more reliable, and less vulnerable to early-season pests.
One of the most satisfying aspects of shallot growing is the multiplication effect: plant a single small set and, by harvest time, you will lift a cluster of six to twelve plump bulbs. Properly cured, those bulbs can be stored for up to twelve months, meaning a successful harvest can keep your kitchen supplied almost year-round.
How To Grow
Growing Shallots
Shallots are one of the most rewarding alliums to grow. Plant a single small set and, months later, lift an entire cluster of bulbs in return.
Starting Method
Most gardeners grow shallots from sets (small immature bulbs), which are faster and more reliable than seeds. Seeds can be started indoors 8–10 weeks before the last expected frost and transplanted out once the soil is workable.
Timing
- Autumn planting (cool-winter climates): plant sets in mid to late autumn for an early summer harvest. Choose varieties bred for overwintering.
- Spring planting: plant as soon as the soil is workable and no longer frozen — shallots tolerate cold well and benefit from a long growing season.
Soil and Site
- Sun: a full-sun position is essential for good bulb development.
- Soil: well-drained soil is non-negotiable. Heavy, waterlogged soil causes rot. On clay soils, grow in raised beds or add grit to improve drainage.
- Preparation: incorporate well-rotted compost or a balanced general fertiliser a few weeks before planting. Avoid fresh manure.
Planting
- Space sets 15 cm apart within the row and 30–40 cm between rows.
- Push each set into the soil so only the very tip is showing at the surface.
- Firm the soil gently around each set.
- Bird protection: birds often pull up newly planted sets. Cover rows with fine netting or horticultural fleece until the sets have rooted firmly (usually 2–3 weeks).
Care
- Watering: water during dry spells in spring and early summer. Once the foliage begins to yellow and topple, stop watering completely — excess moisture at this stage promotes rot.
- Weeding: shallots have shallow roots and cannot compete with weeds. Hand-weed carefully to avoid disturbing or nicking the bulbs.
- Flower scapes: if a flowering stem appears, remove it promptly so the plant directs energy into bulb production rather than setting seed.
Feeding
Shallots are light feeders. A top-dressing of a balanced fertiliser in early spring is usually sufficient. Avoid high-nitrogen feeds once bulbs begin to form.
Harvesting
Harvesting Shallots
Knowing When They Are Ready
Shallots signal their readiness clearly — there is no guesswork involved if you watch for these signs:
- Yellowing tops: the upright green foliage gradually turns yellow from the tips downward.
- The flop: the necks soften and the foliage collapses flat onto the soil surface.
- Soil splitting: as the cluster expands, you may notice the soil cracking around the base.
Do not rush the harvest. Bulbs lifted too early have thinner skins and will not store as well.
Lifting the Bulbs
Always lift rather than pull shallots — tugging by the leaves can tear the neck and allow rot to enter.
- Choose a dry day, ideally after 2–3 days without rain.
- Insert a garden fork or hand trowel under the cluster and lever upward gently to loosen the roots.
- Lift the entire cluster as one unit and shake off any loose soil.
- Do not wash with water — moisture at this stage is the enemy of long storage.
Curing
Curing hardens the outer skins into a protective shell and is the key to long storage life.
- Sun dry: if the weather is dry, lay clusters on the soil surface for 24–48 hours.
- Airy shelter: move them to a shaded, well-ventilated space — a porch, open shed, or garage. Lay them in a single layer on a wire rack or slatted tray so air can circulate underneath.
- Duration: cure for 2–3 weeks, until outer skins are crinkly and papery and the dried roots feel brittle like straw.
Sorting and Storage
- Separate the individual bulbs from each cluster.
- Rub off loose, dirty outer skins and trim dried roots.
- Trim dried foliage to about 2–3 cm, or leave long for braiding.
- Store in mesh or net bags in a cool, dark, dry location.
- Well-cured shallots can keep for 6–12 months.
Selecting Sets for Next Year
Before storing, set aside a handful of the firmest, best-formed medium-sized bulbs to replant next season, saving on buying new sets.
Common Problems
Common Shallot Problems
Pests
Onion Fly (Delia antiqua) The larvae tunnel into bulbs and roots, causing plants to wilt and collapse. Affected plants often have yellowing, wilting foliage. Prevent by covering rows with fine insect-proof mesh from planting onwards. Rotate alliums to a fresh bed each year.
Thrips Tiny insects that rasp at the leaf surface, leaving silver streaks on the foliage. Populations build in hot, dry weather. Encouraging natural predators and using reflective mulches can help reduce damage.
Birds Newly planted sets are commonly pulled from the soil by birds. Cover with netting or horticultural fleece until the sets have rooted firmly.
Diseases
Downy Mildew (Peronospora destructor) A fungal-like disease causing pale patches on leaves with a grey-purple furry growth on the underside. It thrives in cool, damp conditions. Improve air circulation by correct spacing, avoid overhead watering, and remove affected foliage promptly. Do not compost infected material.
White Rot (Stromatinia cepivora) A serious soilborne fungal disease causing white fluffy mould at the base of the bulb and yellowing, dying foliage. There is no cure once established. Remove and destroy all affected plants. This pathogen can persist in soil for 20+ years, so strict crop rotation is essential.
Neck Rot (Botrytis allii) Usually develops in storage rather than in the ground. Infected bulbs become soft and grey-brown at the neck. Prevent by curing bulbs thoroughly before storage and ensuring good airflow around stored bulbs.
Cultural Problems
Bolting (Flowering) Shallots may throw up a flowering stem, particularly if sets experience a cold spell after planting. Remove flower stems promptly as they divert energy away from bulb development.
Poor Bulb Formation Caused by planting too late, insufficient sun, excess nitrogen, or drought stress during the bulbing phase. Ensure a long growing season and avoid high-nitrogen feeds once bulbs start to form.
Soft Bulbs in Storage Usually the result of insufficient curing or harvesting in wet conditions. Always harvest on a dry day and cure for a full 2–3 weeks before storing.