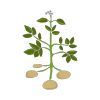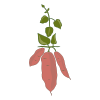
Sweet potato (Ipomoea batatas) is a vigorous trailing vine grown for its starchy, sweet-flavoured storage roots. Despite its common name, it is not closely related to the ordinary potato — it belongs to the morning glory family (Convolvulaceae) — and it is also quite distinct from true yams, with which it is frequently confused.
Varieties
Sweet potatoes come in a striking range of flesh and skin colours:
- Orange-fleshed (e.g. Beauregard, Jewel): the most widely grown type; moist, sweet, and high in beta-carotene.
- White-fleshed (e.g. Hannah): firmer and slightly nuttier, behaving more like a conventional potato.
- Purple-fleshed (e.g. Stokes, Okinawan): rich in anthocyanin antioxidants with an earthy, mildly floral flavour that holds its colour when cooked.
Nutritional Value
Sweet potatoes are considered one of the most nutritious root vegetables available:
- Exceptionally high in beta-carotene (provitamin A), with a single medium tuber often exceeding daily requirements.
- Good source of potassium, vitamin C, manganese, and dietary fibre.
- Their fibre content gives them a lower glycaemic index than many starchy staples, providing more sustained energy release.
- Beta-carotene absorption is enhanced when sweet potatoes are eaten with a small amount of healthy fat such as olive oil.
Culinary Uses
Sweet potatoes are extremely versatile in the kitchen — roasted until caramelised, mashed, made into wedges, added to soups and curries, or even used in baked goods such as brownies and muffins.
How To Grow
Sweet potatoes are grown not from seed but from slips — rooted sprouts taken from a mature tuber. They are warm-season crops that need a long frost-free period and plenty of heat to produce a good harvest.
1. Producing Slips
Start slips 6–8 weeks before your planned outdoor planting date:
- Soil method (recommended): Lay a healthy, organic sweet potato horizontally in a tray of moist potting compost, burying it halfway. Keep in a warm spot at around 24–27°C.
- Water method: Suspend the lower half of a tuber in a jar of water on a warm, sunny windowsill using toothpicks.
- Leafy sprouts will appear in 2–4 weeks. When slips are 15–25 cm long, twist them off the tuber and place their stems in water for several days until roots develop.
2. Preparing the Bed
- Soil: Loose, well-draining sandy or loamy soil is ideal. Avoid heavy clay; use raised beds or mounded rows if necessary.
- Fertility: Incorporate plenty of compost but avoid high-nitrogen fertilisers, which promote leafy growth at the expense of tubers. A balanced feed higher in phosphorus and potassium is preferable.
- Warming the soil: In cooler areas, lay black plastic mulch over the bed for 1–2 weeks before planting to raise soil temperature.
3. Planting
- Wait until the soil temperature is at least 18°C and all frost risk has passed.
- Plant slips 30 cm apart in rows spaced 90 cm apart.
- Bury each slip up to its first pair of leaves to encourage a strong root system.
4. Care During the Season
- Watering: Provide approximately 2.5 cm of water per week. Reduce watering significantly in the last two weeks before harvest to prevent tubers from cracking or rotting.
- Vines: Do not prune the trailing vines — the foliage acts as a solar panel, driving sugar production in the tubers underground.
- Weeding: Keep the bed weed-free in the first few weeks; once the vines spread, they act as a living mulch.
5. Curing After Harvest
Freshly dug sweet potatoes are starchy rather than sweet and have thin, fragile skins. Curing is essential:
- Place unwashed tubers in a warm (27–29°C), humid environment for 7–10 days.
- This process toughens the skin, heals small cuts, and converts starches to sugars.
- After curing, store in a cool, dry place (around 13–15°C) where they will keep for several months.
Harvesting
Sweet potatoes require careful harvesting to avoid damaging their thin skins, which are easily nicked and will not heal properly without curing.
When to Harvest
- Most varieties are ready 90–120 days after transplanting slips.
- Watch for the leaves beginning to yellow — this is the natural signal that the plant is finishing its growth cycle.
- Critical rule: Harvest before soil temperatures drop below 10°C. Tubers left in cold, wet soil quickly rot.
- If vines are blackened by an early frost, harvest immediately — do not leave tubers in the ground.
How to Harvest
- Clear the vines first by cutting them back so you can see the crown of each plant.
- Use a garden fork, not a spade — a spade is far more likely to slice through tubers. Insert the fork 30–45 cm away from the plant centre and lever upwards gently.
- Lift the central root ball carefully; most tubers cluster directly beneath the main stem, but some may have spread further out.
- Hand-dig through the loosened soil to retrieve any remaining tubers.
- Handle each tuber as gently as possible — the skin is paper-thin when freshly dug and bruises very easily.
Curing (Essential)
Do not wash freshly harvested sweet potatoes. Brush off loose soil with your hands only.
- Cure in a warm (27–29°C), humid location for 7–10 days.
- Curing toughens the skin, seals any wounds, and converts starches into sugars — transforming a bland, starchy root into the sweet, flavourful vegetable you expect.
- After curing, move to a cool, dry, well-ventilated storage area (around 13–15°C) where they can keep for several months.
Common Problems
Sweet potatoes are relatively trouble-free compared to many vegetables, but there are several issues to watch for:
Pests
Sweet Potato Weevil (Cylas spp.)
The most serious pest worldwide. Adults and larvae bore into stems and tubers, leaving behind a bitter, tainted flavour and entry points for rot. Affected plants show wilting vines and tunnelled tubers.
- Control: Use certified, weevil-free slips. Rotate crops annually. Harvest promptly and do not leave tubers in the ground after the foliage dies back.
Wireworms
Larvae of click beetles that tunnel into tubers, leaving small holes that invite secondary rot.
- Control: Avoid planting into freshly cultivated grassland. Rotate crops and keep beds well-cultivated in autumn to expose larvae to birds and frost.
Whitefly and Aphids
Can colonise the foliage, weakening plants and potentially spreading virus diseases.
- Control: Encourage natural predators (ladybirds, lacewings). Use insecticidal soap spray if infestations become severe.
Diseases
Black Rot (Ceratocystis fimbriata)
A fungal disease causing dark, circular lesions on tubers. Infected tubers become inedible.
- Control: Only plant from healthy, certified slips. Avoid wounding tubers during harvest and cure promptly.
Fusarium Wilt
Causes yellowing and wilting of vines and internal discolouration of stems and tubers.
- Control: Use resistant varieties where available. Practice strict crop rotation.
Soft Rot (various bacterial pathogens)
Commonly develops in storage if tubers are damaged at harvest or stored in cold, damp conditions.
- Control: Handle tubers carefully, cure thoroughly, and store in warm, dry conditions.
Environmental Problems
- Cracked tubers: Caused by irregular watering or excess moisture near harvest. Reduce irrigation in the final two weeks before digging.
- Forked or misshapen tubers: Often caused by stony or compacted soil. Prepare a deep, loose seedbed to encourage uniform root development.
- Poor yield / excess foliage: Usually the result of overly rich, high-nitrogen soil. Avoid fresh manure and excessive nitrogen fertilisers.