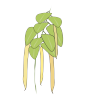
Wax beans are a variety of bush or pole bean producing bright, golden-yellow pods that are as delicious as they are eye-catching. They belong to the same species as green beans (Phaseolus vulgaris) and share a similar growing habit, but their distinctive yellow colour makes them a striking addition to both the garden and the plate.
The pods are typically 10–15 cm (4–6 inches) long, smooth, tender, and slightly sweeter in flavour than standard green beans. When harvested young, they are crisp and stringless, making them ideal for eating raw, steaming, sautéing, or adding to stir-fries, salads, and casseroles. Left too long on the plant, pods become fibrous and the seeds inside swell, reducing eating quality.
Wax beans are fast-growing and rewarding, maturing in as little as 50–60 days from sowing. They are nitrogen-fixing plants, meaning they enrich the soil for subsequent crops, making them an excellent choice in a crop rotation plan. Both bush and pole varieties are available, offering flexibility for small gardens and larger plots alike.
How To Grow
Sowing
Wax beans are best direct sown into their final growing position once the soil has warmed to at least 18–21°C and all risk of frost has passed. Sow seeds 3–4 cm deep, spacing bush varieties 10–15 cm apart in rows 30–45 cm apart. Pole varieties should be spaced 15–20 cm apart along a trellis, wigwam, or sturdy support structure at least 1.5–2 m tall.
Soil and Site
Choose a sunny, sheltered spot with well-drained, fertile soil. Work in well-rotted compost before sowing to improve structure and moisture retention. Wax beans prefer a slightly acidic to neutral pH (6.0–7.0). Avoid overly rich, nitrogen-heavy soil — as nitrogen-fixers, beans produce their own supply and too much nitrogen encourages leafy growth at the expense of pods.
Watering
Keep soil consistently moist throughout the growing season. Watering is especially critical during flowering and pod set — irregular watering at this stage leads to flower drop and reduced yields. Water at the base of the plant to minimise fungal disease risk.
Feeding
Beans generally need little additional feeding. If plants look pale or growth is slow, a light application of a balanced fertiliser can help, but avoid high-nitrogen feeds.
Support
Bush varieties are self-supporting. Pole varieties need a framework of canes, a trellis, or a wigwam structure in place before sowing, as the plants climb quickly once established.
Mulching
Apply a layer of organic mulch around the base of plants to retain moisture, suppress weeds, and maintain even soil temperature.
Harvesting
When to Harvest
Wax beans are ready to harvest approximately 50–60 days from sowing for bush varieties and 60–75 days for pole varieties. Check pods regularly once plants begin to flower — pods develop quickly in warm weather.
Harvest when pods are firm, smooth, and bright yellow, typically 10–15 cm (4–6 inches) long. The beans inside should be small and not visibly bulging through the pod wall. Pods that are allowed to mature fully become tough and stringy.
How to Harvest
Using both hands, hold the stem with one hand and snap or cut the pod free with the other. Avoid yanking the pod, which can uproot shallow plants or strip stems. Scissors or snips are ideal for clean cuts that minimise plant damage.
Harvesting Frequency
For maximum yield, harvest every 2–3 days during peak production. Regular picking signals the plant to continue producing new pods. Leaving overripe pods on the plant triggers the plant to stop flowering and divert energy to seed production.
After Harvesting
Fresh wax beans are best used immediately but can be stored in the refrigerator for up to 5 days. For longer storage, blanch pods briefly in boiling water, cool in ice water, then freeze. At the end of the season, cut plants at ground level rather than pulling them up — the roots contain nitrogen-fixing nodules that benefit the soil.
Common Problems
Pests
- Aphids – Colonies of small insects cluster on young shoots and undersides of leaves, causing distorted growth. Remove by hand, blast with water, or apply insecticidal soap.
- Bean seed fly – Larvae attack germinating seeds and seedlings at soil level. Sow into warm soil to encourage rapid germination and reduce vulnerability.
- Spider mites – In hot, dry conditions, mites cause fine speckling on leaves. Increase humidity and apply a suitable miticide or neem oil if infestations are severe.
- Slugs and snails – Seedlings are particularly vulnerable. Use physical barriers, copper tape, or organic slug controls around young plants.
Diseases
- Halo blight (Pseudomonas syringae pv. phaseolicola) – Water-soaked spots surrounded by yellow halos appear on leaves. Use certified disease-free seed and avoid overhead watering.
- Bean rust – Orange-brown pustules on leaves in humid conditions. Improve air circulation by appropriate spacing and remove affected foliage promptly.
- Powdery mildew – White powdery coating on leaves, more common in dry conditions with cool nights. Ensure good air circulation and avoid water stress.
- Root rot – Caused by waterlogged soil. Always sow into well-drained soil and avoid overwatering.
Other Issues
- Poor pod set – Often caused by irregular watering or temperature extremes during flowering. Maintain consistent soil moisture and protect from heat stress.
- Yellowing leaves – May indicate overwatering, nutrient deficiency, or root problems. Investigate soil drainage and moisture levels.