How to measure your garden - the tried and tested approach

This guide shows you how to quickly get measurements from your garden so you can translate them to your VegPlotter plan.


A crucial part of planning your garden is to take measurements of its key features so that you can get an accurate picture of how much space you have available. It also helps you to plot out your garden with a tool like our Vegetable Garden Planner so that planning your planting and harvest schedules and any future changes becomes a lot more manageable.

This guide takes you through the simplest way to measure your garden, regardless of its shape or size.

Tools Needed

To measure any garden, you will need three items: some paper, a pencil (or pen) and a measuring device. The most popular options for measuring devices include:

tape measure and string getting ready to measure out a garden

Tape Measure

If you have a tape measure long enough to capture most measurements in your garden, then this is your best option. You can, of course, mark a point and then measure again if your tape measure isn't long enough too.

Note: If you don't have a tape measure long enough, you could create your own using rope or string. Just mark out distances using a ruler etc.

Richard striding out the distances in his garden

Your legs (strides)

Our preferred way to measure distance, as it provides the most flexibility, is extremely quick, even if it can be the least accurate.

Here you walk out the distances counting your strides as you go. You then measure your average stride length by walking out strides for a known distance and then divide that distance by the number of strides. This will give you the average distance for each stride. You then multiply the number of strides counted when measuring a distance by your stride distance to get the actual distance for that measure.

If you have a tape measure long enough to capture most measurements in your garden, then this is your best option. You can, of course, mark a point and then measure again if your tape measure isn't long enough too.

Method

Step 1: Start with a Rough Sketch

Start by sketching out the shape of the garden. And include the key features in roughly the positions that they sit. You don't need to worry about drawing it accurately to scale right now. We are only creating the rough backdrop to add our measurement notes too.

Here is an example of the rough sketch I did of the VegPlotter HQ garden

Rough sketch of the VegPlotter HQ garden

Step 2: Identify your reference line, and measure it.

Here we choose a line in your garden that we will use as the reference. This should be:

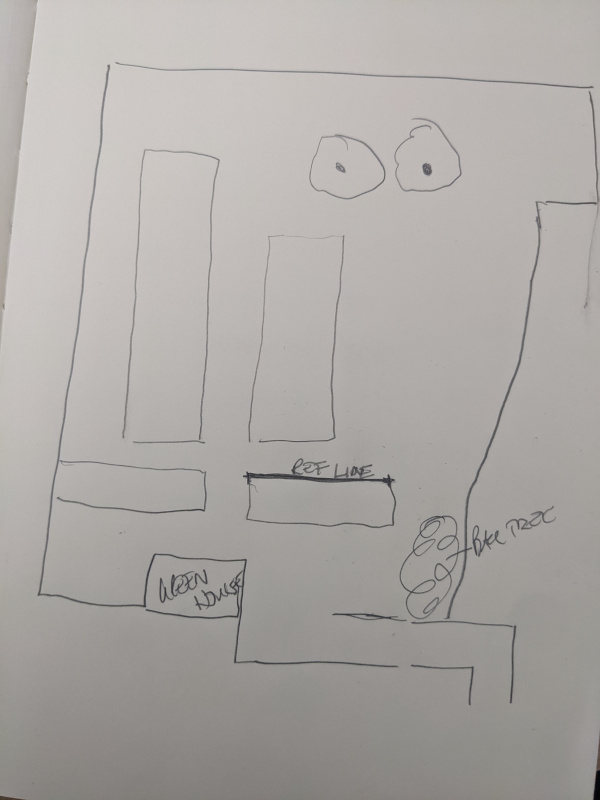
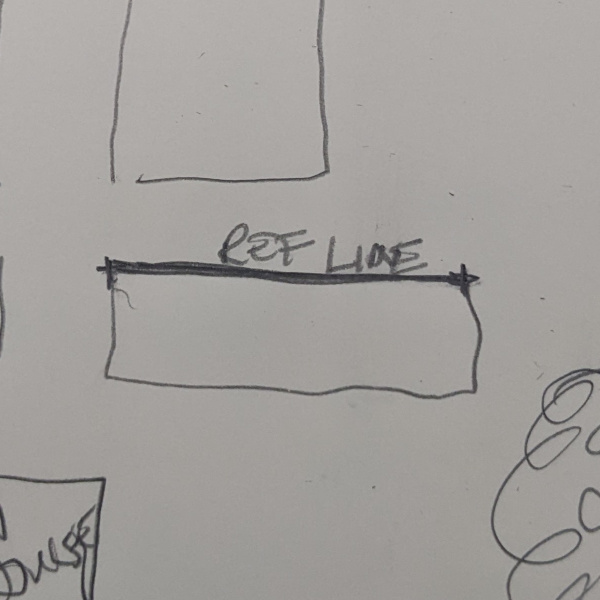
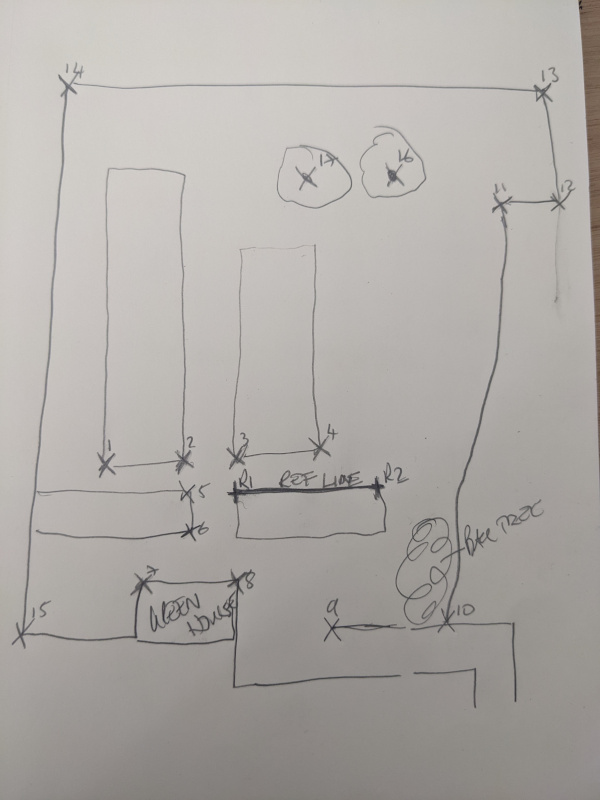
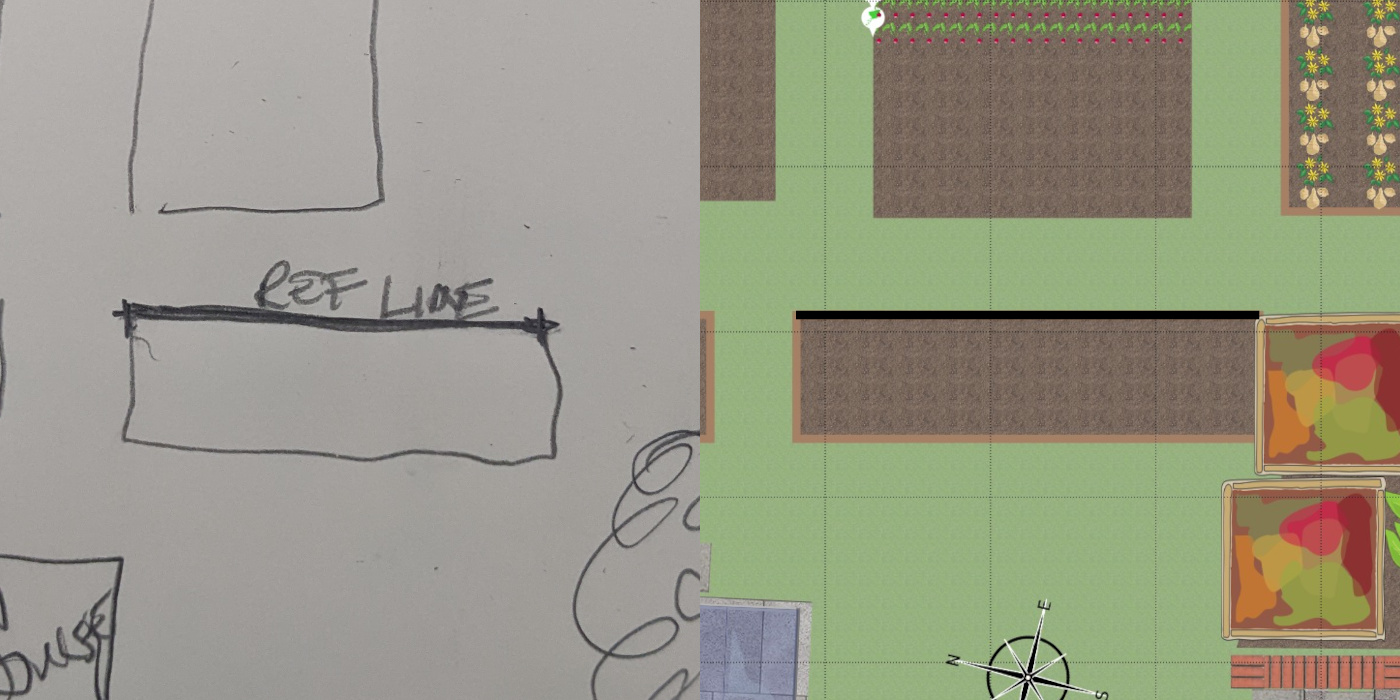
  • a straight line, such as a part of the boundary, the wall of a shed, or the side of a vegetable bed,
  • measurable,
  • accessible. i.e. from each end, you can measure other points of your garden, and
  • The longer this straight line is, the better. A longer reference line will improve the accuracy of the position for the other measurements you take. The power of Triangulation!

Measure this reference line and record that on your rough sketch.

Here is the section of the rough sketch showing the Reference line I used in my Garden

Rough sketch of the VegPlotter HQ garden with keypoints marked with crosses

Step 3: Identify the key structures of your garden and measure

Identify the structures of your garden and the key points for each. These can be sheds, greenhouses, hedges, vegetable beds etc. Be mindful of their shape, as this will help determine how to measure them and their position. For example:

  • Rectangular structures, such as sheds and greenhouses. Here you only need to use the two closest corners to your reference line as the key points.
  • Irregular structures. Here it is best to take measurements for each corner.
  • for Circular structures, you can use the centre as the key point.

Now for each structure in your garden, you can take the following measurements:

  • The distance to each key point to both ends of your reference line.
  • Measure the size of the structure:
    • Width and length for rectangular shapes
    • Diameter or radius for circular shapes
    • No extra measurements are needed for irregular shapes if you've measured all corners as key points.

Include all these measurements on your rough sketch or note them on a separate piece of paper.

Here is the rough sketch with key points marked with crosses

Rough sketch of the VegPlotter HQ garden with keypoints marked with crosses

Step 4: Translate to a scale drawing/plan

This is where we use the measurements taken to draw out the layout of your garden to scale. In this part, we will focus on laying out your plan in VegPlotter's vegetable garden planner, but the principles apply equally to drawing out your plan on paper or any other drawing tool.

Start by adding the structure with the reference line that you used when measuring out your garden. Here I used the central raised vegetable bed.

plan showing the bed used as the reference line

Then for each structure, you add in / drag on the structure and set its size as per your measurements. You then need to position it as described in the next section below.

  • For Rectangles and Circles, it is easy as you enter the width and length or diameter. You then need to position it as described in the next section below.
  • For irregular shapes setting the position of each corner as described below will set the size.

Setting the position of each key point.

This is just a case of measuring from each point on the reference line to the point you want to position. Where each line meets /joins is the position of that point. if you do the same for each key point, the shape will then be in position.

Tip: Using Vegplotters garden planner, you can use a length of the fencing structure to measure distances on the plan. Just delete them when you are done.

The finished plan 😎

Finished VP Plan