How to change the default plant row direction

VegPlotter has a unique drag and drop mechanism that helps you quickly and easily add rows of plants to your garden plans. The default row direction for plants in a bed is vertical (when looking at your garden plan). But you can easily change the default planting row direction for each bed as follows.
Each bed has a default row direction. There are two ways to set this. Both of which require you to select the bed first (you'll need to have the bed menu active to select a bed).
- move the row direction control The screenshot below shows the row direction control. This is displayed when the bed is selected if the bed is large enough. If it is not displayed, you can still change the row direction using method two below.
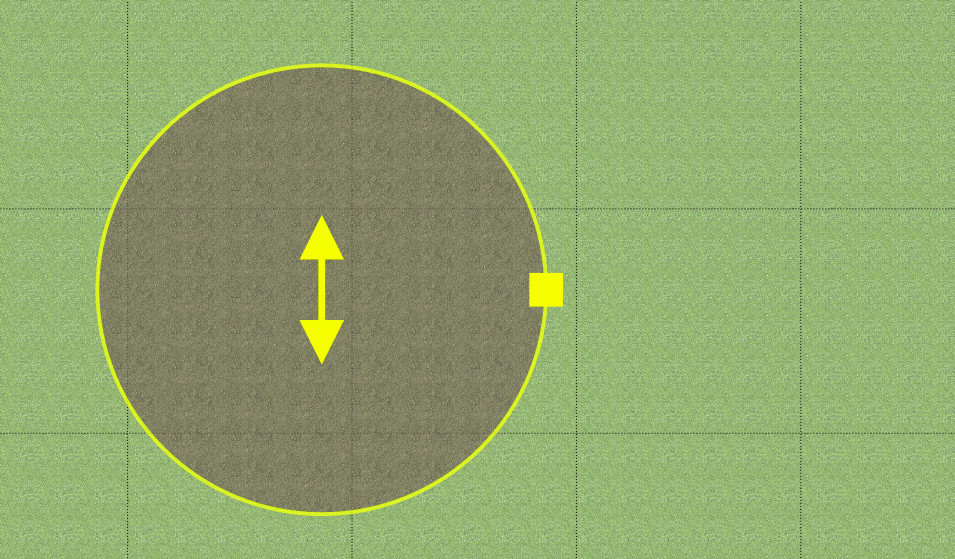
- Enter a Row Direction angle directly When a bed is selected, the Bed Details menu appears in the right-hand panel (you may need to tap the top-right icon to open the menu on smaller screens). You can enter a new angle in degrees in the Row Direction field(0, 180, and 360 degrees all result in a vertical row, 90 = horizontal, 45 is diagonal etc).
Note: Changing the row direction does not affect existing planting rows in the bed (only new ones that you add). You can also change the orientation of individual planting rows by selecting them and dragging the ends to a new position.