Quick Start Guide
For this short guide we are assuming that you have already registered for a VegPlotter account. If not you'll need to do that here https://vegplotter.com/register.
Once registered and logged in you'll have full access to all of VegPlotter's vegetable garden planning goodness. So lets walk you through how to create your vegetable garden (plot) in VegPlotter.
To plan out or represent your garden layout in VegPlotter we advise that you go and measure out your garden first. If you haven't done that already, don't worry, you can do that later but you'll need to guess your garden's measurements to continue.
Note: A quick way to take rough measurements in your garden is to count the number of your strides then measure a stride when you get home. This will give you the rough measurements you need.- Create a new plot/garden
- Set your vegetable garden layout
- Add plants and plan your planting schedule
- Add Notes
1. Create a new plot/garden
To create a plot simply click or tap the [Create New Plot] from the MyPlots Menu. If you're on a mobile or tablet with a smaller screen the menu may be hidden and can be shown by tapping on the VegPlotter logo.
Menu on Desktop
 The full menu is displayed on larger screens
Menu on Phone
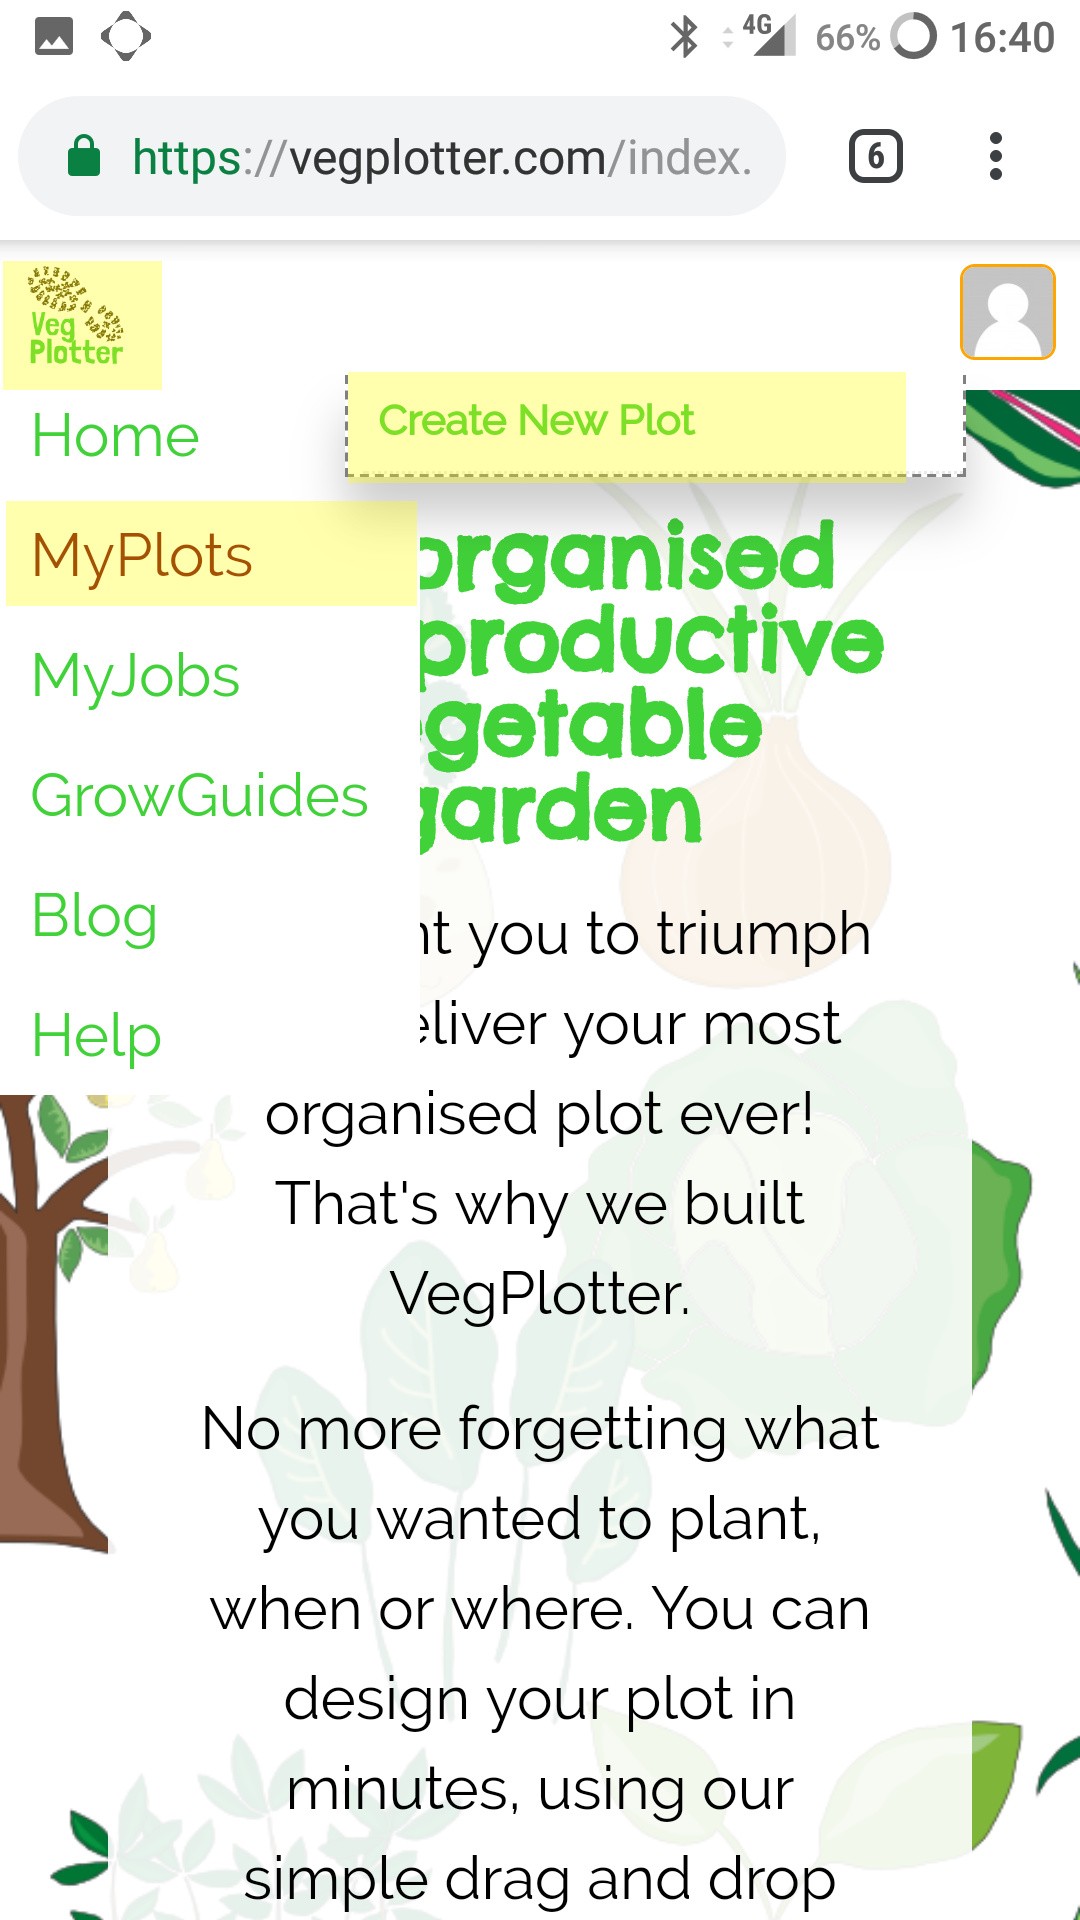
The menu is hidden on phones and tablets and can be opened by tapping the VegPlotter logo.
2. Set your vegetable garden layout
Once you've clicked your Create New Plot you should have a nice blank garden plan in front of you.
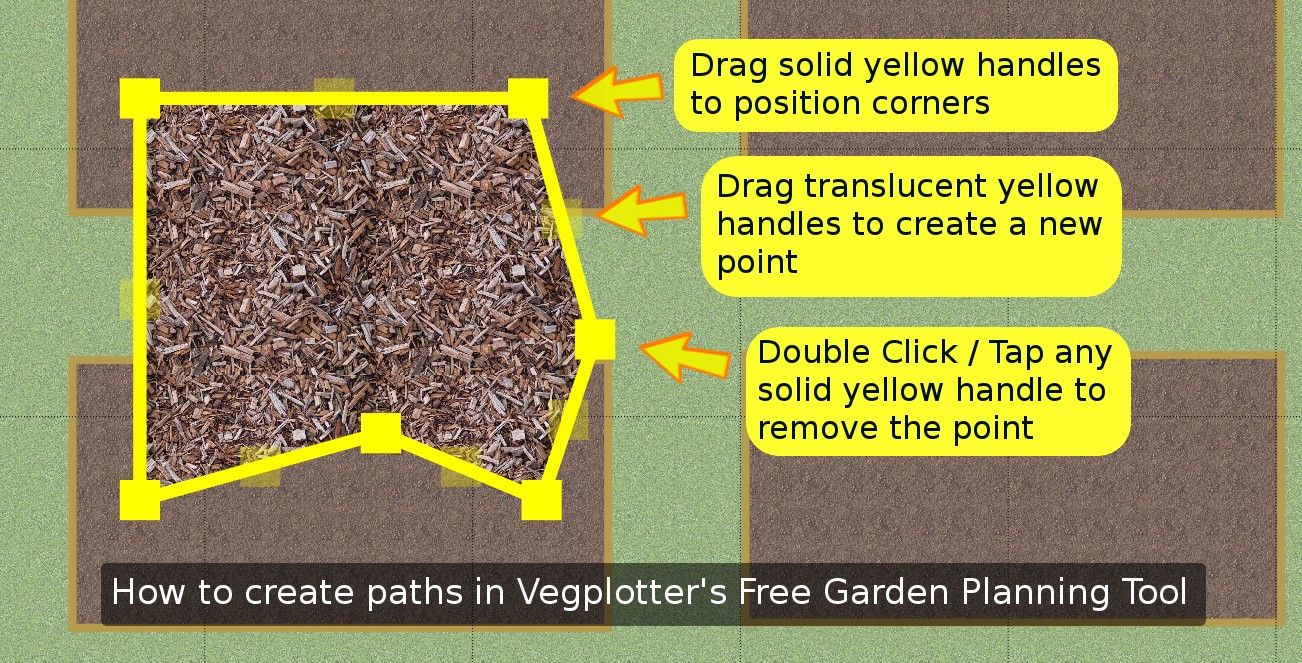
We recommend that your start by adding your permanent items, like beds, sheds, greenhouses and paths.
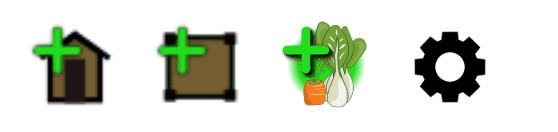
Items to add to the garden plan are found in the right hand menu. This is broken down into 4 sections. Each with an icon to represent the item types in contains. See below. These are (from left to right): Structures/Paths, Soil Beds, Fruit/Vegetables, and Settings.
Note: Once you click on a menu section it becomes the active layer on the garden plan and you'll only be able to interact and change items of that type until you change to a different menu. i.e. if you have the structures/paths menu active you will only be able to select structures and paths objects on the plan. You won't be able to select beds or plants until you click on their menu.To add an item to the garden plan you simply need to drag the picture of the item from the menu on to your garden plan and drop it where you need it.
You can then select it by tapping on it and change it's shape, size, rotation and location using the yellow handles that are displayed on to of the selected item.
3. Add plants and plan your planting schedule
IMPORTANT: You can only add plants in to Beds. Therefore you must have added a bed before you can add plants to your plot. You can add plants in the same way as you do for the structures, paths and beds: find what you are looking for in the right hand plant menu and drag the picture over a bed. That said there are some important points to note:
- The month shown at the top of the screen sets when VegPlotter thinks you want to plant it.
- Plants in the menu will only be displayed if VegPlotter thinks you can plant them in that month (see point 1). You can turn this off and display all plants irrespective of month by unchecking "hide untimely plants". But bear in mind that when you drag on the plant, VegPlotter still assumes you want to plant it in the month displayed.
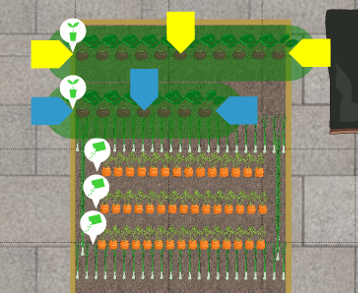
- The row direction of a bed can be changed by selecting the bed and moving the arrow in the middle (don't forget you need to have the bed menu active to select a bed).
- You can change the row direction of an individual row of veg/fruit plants by manipulating the yellow (or blue - more on that below) end handles.
- Yellow end handles on plants mean that the row will expand to the edges of the bed (or up to other rows in the way) as you move it around the bed.
- Blue end handles on plants mean that the row will not expand to the edges and will stay the same length as you drag it around.
- You can switch the colour of the end handles by double clicking/tapping on a row.
- The middle handle of a row allows you to drag out multiple duplicate rows across a bed.
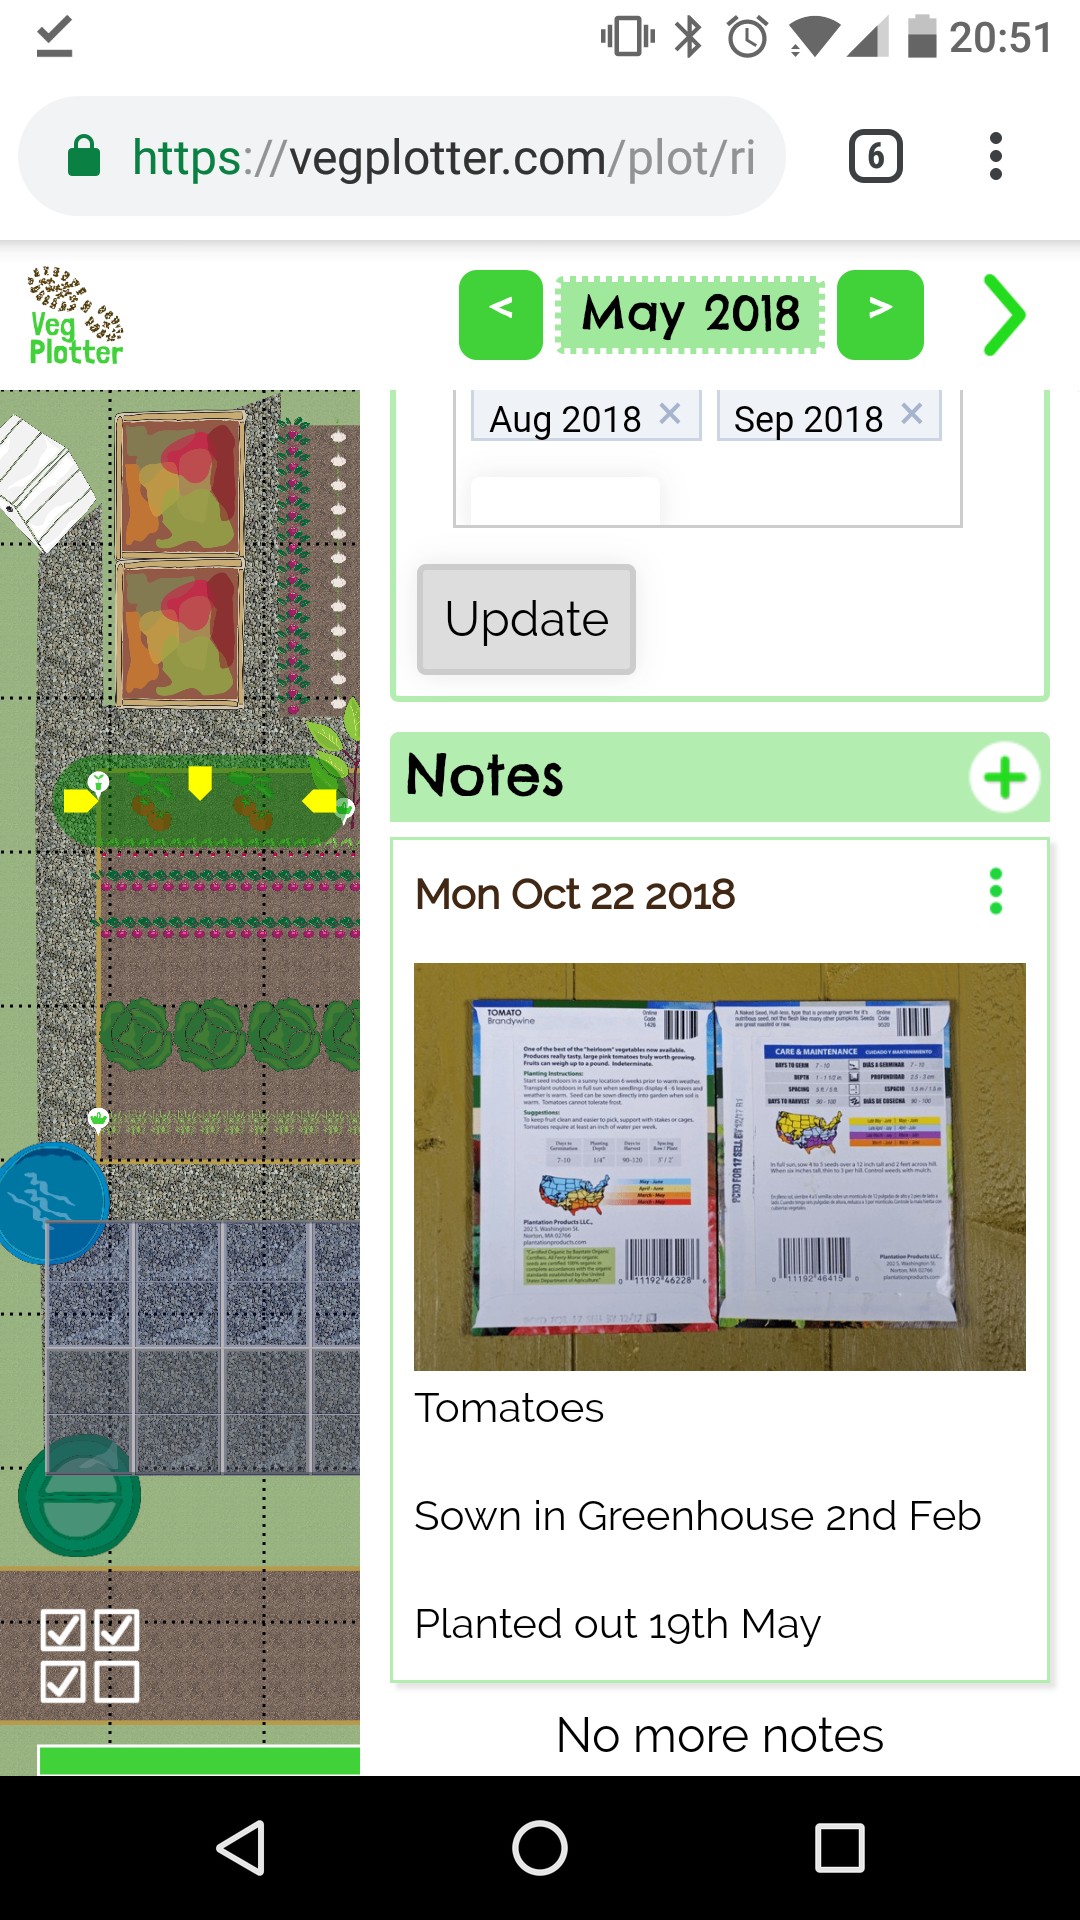
4. Add Notes
VegPlotter allows you to add text notes and photos to any items on your plot. This allows you to capture information that you need to remember. For example it allows you to:
• Snapshot a photo of a seed packet and attach it to the corresponding row in your plan. • Record the actual dates of key events, like when you planted the row, when you harvested it, or when pest problems occurred. • Record your harvests, including photos and details such as yields, quality etc.
You can add notes from your computer, phone or tablet. Simply select the item that you want to record a note for and click the + (plus sign) in the Notes area at the bottom of the right hand menu. Add in what you need, upload or take any photos you want to attach and hit save. The note will be saved and ready for you to refer to next time you need it.