Starting seeds indoors: tips and tricks for success
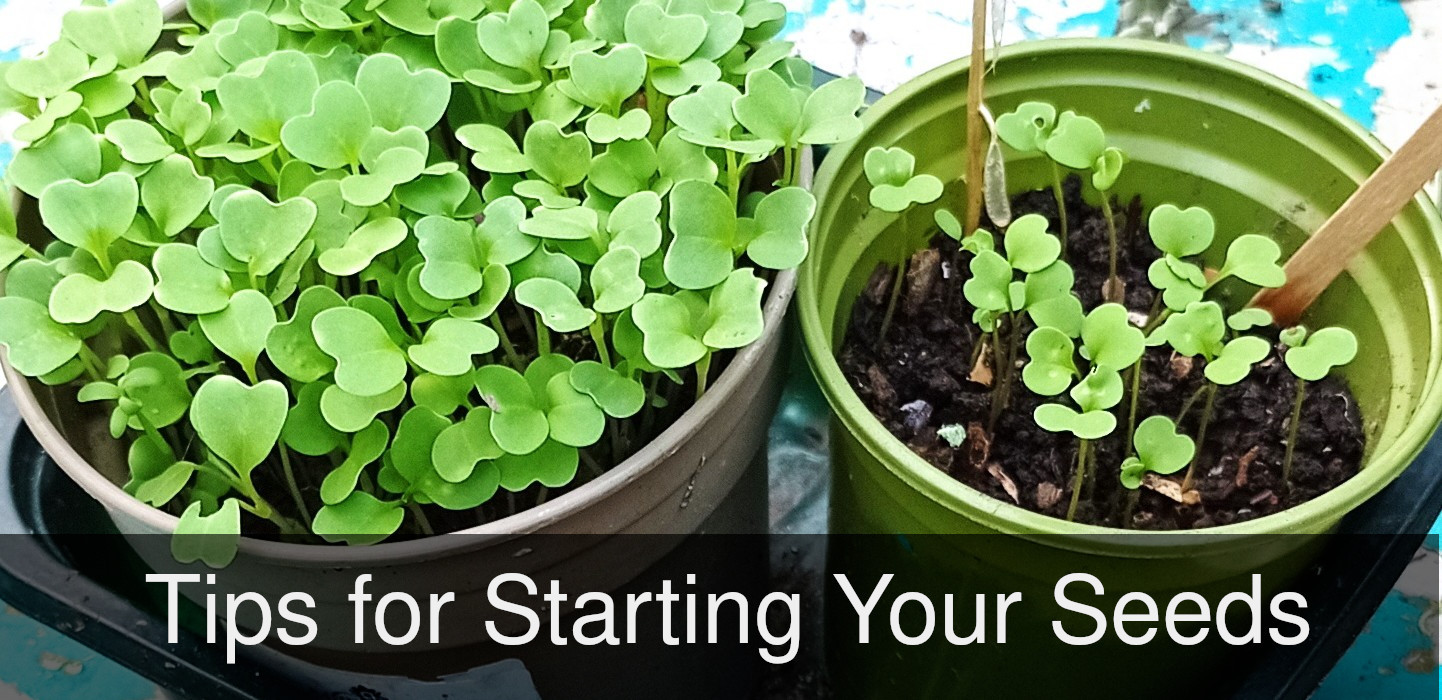
After last week’s snow, I am determined to get started. I know that Richard already has his rows of tomato plants on his window sill, so I have some catching up to do. Wash out those pots from last year to make sure no snails are lurking in there and also to give your new seeds a disease-free environment. Check out which window in your house the sun hits for longest, and then get a tray ready with pots to house your new seedlings.
Which seeds can I start indoors in March?
Plants that need a warm place to start growing, include tomatoes, cucumbers, courgettes (zucchini) aubergines (eggplant), leeks, cabbages, Brussels sprouts, squashes, and pumpkins.
Some seeds are pretty hardy and these can go straight into the ground later this month like peas, radishes, some carrots, and parsnips. I prefer to sow my cabbages and broccoli into a prepared bed outside. On the back of the seed packet, you will see “Sow direct”.
Other seeds cannot go into the cold soil outside until the risk of frost is gone, but you can give them an early start indoors and then transplant them out when the risk of frost is over.
What do seeds need to germinate?
If the soil feels cold to the touch, it does not send the right signal to a seed. Most seeds need a minimum temperature to activate germination in the wild so indoors, you need fertile potting compost and some warmth to fool the seeds it is time to grow. All seeds need water so keep an eye on the pots and do not let them dry out completely.
Check the germination requirements on the seed packet too, because some seeds (like sweetpeas) prefer to be soaked in water overnight before planting, while others can be planted just as they are.
What do I need to get started?
Seeds, clean pots, compost (and a trowel), water, sunshine, and heat are the vital ingredients for most seeds to germinate.
Seeds. Select them carefully if you want to save seeds. Every year I grow extra sweetcorn, beans, peas, and squash that came from organic original seeds. Organic means they will reproduce exactly like the parent but be careful with F1 seeds. F1 seeds are bred to produce a great crop for one year only and there is no guarantee that their seeds will grow into the same plant. I love F1 squash seeds because they are reliable in their growing year but not for saving.
Compost. The best soil for new seeds should not be straight out of your garden. Compost needs to be fresh, sterile stuff and homemade compost may have lots of seeds that survived the composting process. Specialist seed compost provides your seedlings with the nitrogen, phosphorus, and potassium they need to grow healthy roots, a strong stem, and foliage. Purchased compost is also sterile, reducing the risk of introducing disease to your new seedlings.
Water pots initially and then check every 1-2 days. Keep a watering can of water at room temperature to give them moisture that does not bring on a chill. Remember that some plants prefer rainwater too so check your seed packet before you add tap water.
Heat and light. It is useful to keep your seeds warm with a plastic bag cover over the whole pot, and perhaps a heated propagation mat. This keeps more moisture in the soil too. You need space on south-facing windowsills too, so your seedlings can grow towards the sun. Keep turning the pots around every few days because otherwise, the stems get leggy. If you are lucky enough to have a greenhouse, you can set trays of plants in there and make sure you keep the door closed to keep all the heat in.
Particular instructions for seeds.
Your seed packets normally tell you how to grow them best. Squash, cucumbers, and large seeds prefer to be planted sideways, and one side becomes the stem, while the other becomes the root.
Cucumbers, squash, pumpkins: Put seeds sideways, 2 per pot, and cover them both with soil. Water them well. Seeds are planted sideways to avoid water completely soaking the seed as rot is common. Big seeds allow water to drop vertically and seedlings have a better chance of survival. Plant lots of these at regular intervals so that you can stagger the cutting times too.
Sweetpeas need soaking overnight and then put 3-4 in a pot, cover with soil, and water them.
Tomatoes: you can grow several in one pot as they are easy to separate when they are small. As soon as there is no chance of frost you can dig your seedling tomatoes into the soil with some support like bamboo or a stake.
Parsley is notorious as a seed that will not grow unless you meet the temperature required or the moisture content, so my advice is to wait a little longer until the ambient temperature is higher then it will come along easier in a greenhouse or on your windowsill. Other herbs can be started off indoors like coriander, parsley, and chives, and then transplanted once the weather is sunnier.
What is “Hardening off”?
This means getting your new seedlings ready for their life outside and as they grow, if the weather suddenly turns tropical you can harden them off by placing them outside for a few hours each day to accustom them to the cold outside. You then take them all back indoors at night time because temperatures drop quite steeply at this time of year. It is helpful to have a tray to put small pots on to move them back in altogether.
Check the weather forecast and then place them in a sunny spot for 1-2 hours at first, but with some wind shelter because a fresh spring breeze could damage them badly. Get them used to being outside gradually until they are ready to survive by themselves.
Other tricks
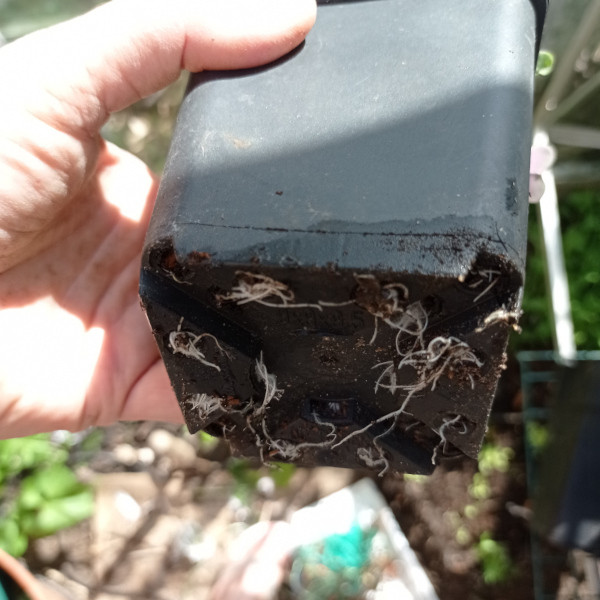
Check the bottom of the pots from time to time as they grow. Otherwise, they can become pot-bound. If you see small white roots coming out of the pot, then it is time to pot them on. Water the pot well, then hold it in your hand and turn it upside down. The seedling can be supported by you, and then gently placed into its next pot or the ground outside.
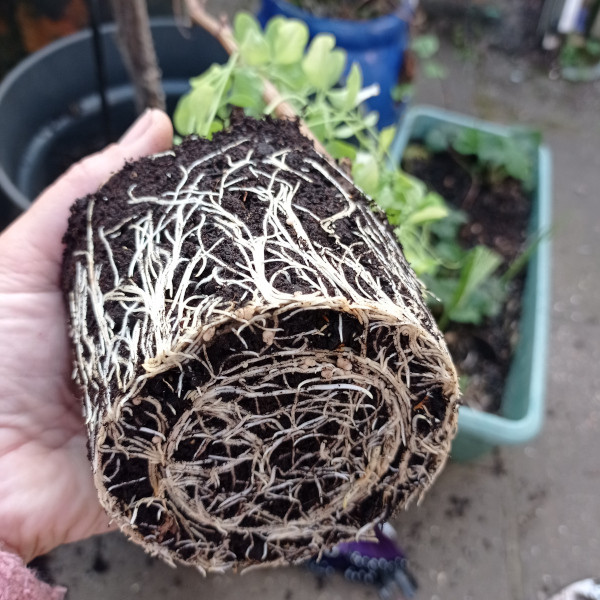
Pot-bound plants. If the roots have grown into the shape of the pot, you will need to soak this pot in water first for at least an hour, and then try to gently separate the roots of each plant into separate plants. Try to get all roots growing vertically again and then you know how deep the hole needs to be. Re-pot the individuals into separate pots or dig them into their permanent homes. Water them well once in the soil.
Tips
Some seeds will not germinate unless the ambient temperature is steady and putting a bag over the pots means this can regulate the temperature while still allowing light to penetrate. Keep watering and then replace the bag. As soon as the green tips appear, take off the cover and use it for the next batch.
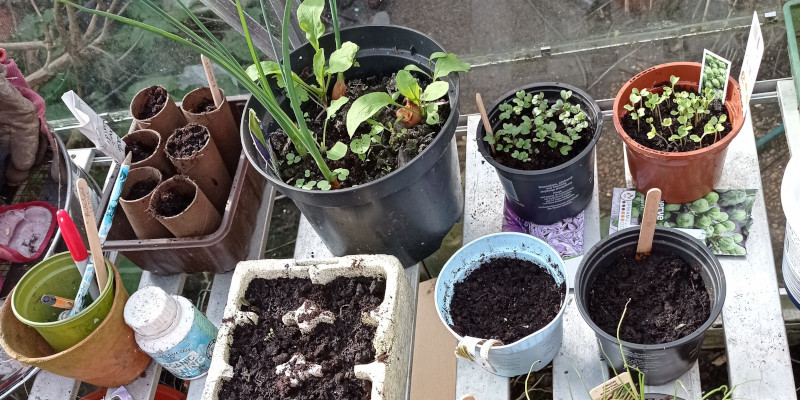
Recycle your toilet roll tubes. Fill six empty toilet roll holders with compost and put them in a mushroom container to make fabulous pots for sweetcorn, beans, and squashes. The long pot gives them plenty of room for root growth and you can plant the whole thing into the ground where it will gradually decompose. An added benefit is that the paper retains moisture so the new seedling will have plenty when it is first planted in.
Warm up the ground outdoors for them in advance by placing black plastic, cardboard, or a cloche. Remove this when you plant the seedlings in, and if it is a cloche, then replace this to keep your new seedlings snug.
Conclusion
Do not plant delicate seedlings outside permanently unless you are sure there is no more frost on the way. In the UK, this is normally late May so check the forecast and get them used to the outside by hardening them off for a week before you finally plant them outside. If frost is forecast, try to cover up newly planted seedlings with a cloche or a plastic bag to give them some protection. The gardening year is almost started as soon as we all start getting tomatoes potted up. Good luck with selecting your seeds and planting them. Next week, let’s look at how to make raised beds cheaply or even for free.