10 ways to build raised beds for (almost) free

Raised beds offer many advantages to the vegetable grower. They provide deeper soil which retains moisture better and they allow you to fertilize easily in a controlled way. They can be mulched to keep adding annual fertility. They tidy your veg plot into mounds of growing space, keeping slugs and snails slightly further away. Leaving wide paths between beds is advantageous for gardeners with disability and mobility issues because they are higher off the ground, easier to seed and weed and great to sit on too. So in this article let’s make some (moveable) temporary raised beds you can try cheaply this year and if you like this method, you can try building more permanent ones next autumn.
The simplest method
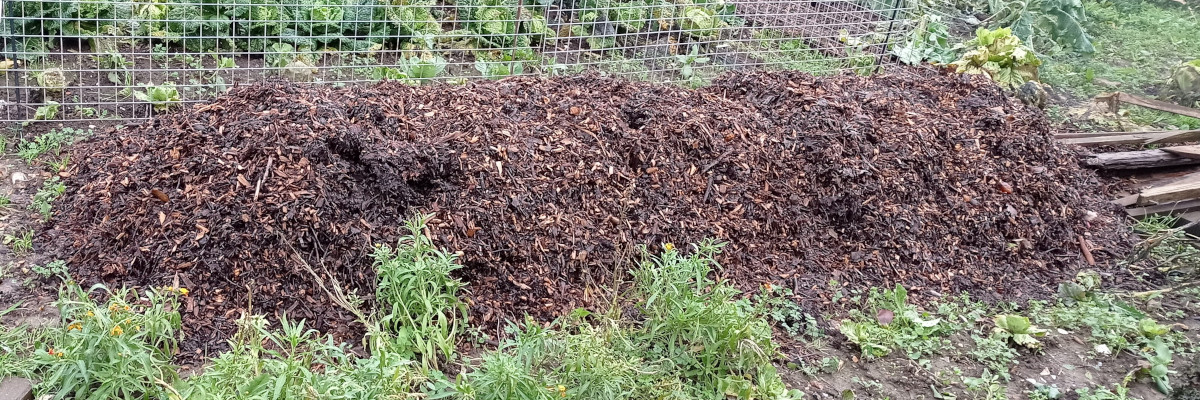
Simply layering several layers of leaf mould, homemade compost, or well-rotted manure will increase the height of your growing beds by several inches off the ground. It may blow away easily so this type of material can be surrounded by planks, bricks, card or wire. Courgettes (zucchini), cucumber, aubergine (eggplant), butternut squash, pumpkins and melons will adore a heap like this. Being higher off the ground will deter slugs and snails and the fertile heap will be fantastic for plants with long stems to sprawl on.
The cardboard box method.
Save any large boxes or cartons that arrive with washing machines or dishwashers and then place these on a lawn or veg growing area you want to convert over a few seasons. Use stakes at the corners to strengthen them and you can use wire to hold them together. Just start to fill the box with composting materials in green layers, (like vegetable and fruit peelings, eggshells, and lawn clippings), followed by brown layers (dried leaves, shredded paper and card, twigs) and allow the waste to fill the boxes. Over time, the waste turns to compost. The cardboard will eventually rot down too but not before you can use it to plant salads, tomatoes, pumpkins etc. Just add a top layer of compost mixed with some garden soil. You can add new layers of cardboard as they arrive in your house too. The wire frame should keep the bed intact.
Netting and straw bales.
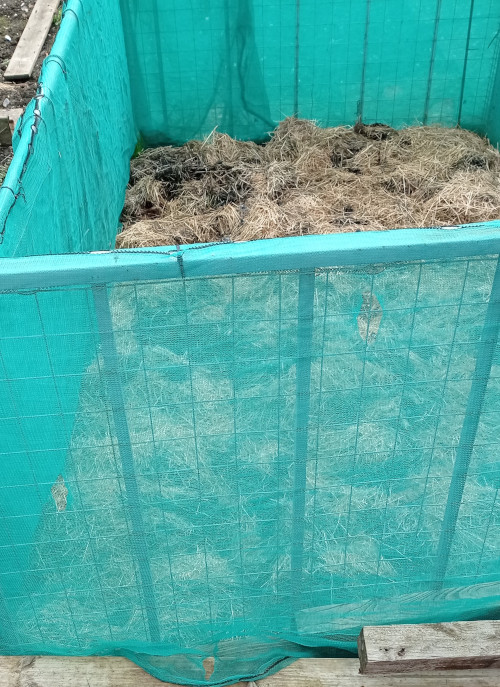
This is another simple raised bed. You need to make a frame with any available material like old railings, stakes and leftover building materials. Place some horticultural netting around the edges to keep everything in place. This will give the plants inside wind protection but it also keeps the heat in without excluding too much light. Start adding hay and straw to build the surface of the bed on top of bare ground. The netting will keep the wind away from delicate plants, and the hay will rot down nicely by spring when you can top it with a layer of manure or homemade compost to get your vegetable patch going.
Using old bricks (or stones).
If you have a supply of leftover bricks or large stones, lay a piece of cardboard on the ground to mark the area. Then just stack them to the size you want your bed to be. You can make beds in any shape you like to suit the bricks. If you are good with cement and want a more permanent bed, then mix some cement and fix the bricks in place. If you have an existing brick wall in the garden and there is no party-wall agreement attached to it, then you can make a compost heap next to the wall and keep laying material down in layers. Over time, the material settles and you have a deeper bed ready for planting.
The cardboard-and-sticks raised bed for growing peas.

I started this one back in the autumn of 2022, digging out the area and then covering it with recycled manure bags over the winter as a weed suppressant. First, I added layers of thin, cut twigs and comfrey leaves to attract worms to the area. Dandelion leaves do the same job. I have lots of black, ribbed planks left by a previous allotment holder so I used one of these to decide the width of the bed. Over the winter, I continued to add browning leaves, some vegetable waste, grass mowings in early spring and finally, a layer of paper that came wrapped around an Amazon gift.
I do not recommend printed cardboard because the printing ink may end up in your vegetables but happily, one of my packages came with thin natural cardboard strips, which I used to make a visual border around my new bed.
Next, I added stakes to support my peas and made sure the cardboard edge is kept tight with these. After the peas have finished, leave the roots in the raised bed to rot down as they fix nitrogen into the soil. Then plant cabbages, sprouts or any vegetable from the cabbage family which will love this rich soil.
Using chicken wire to make a temporary raised bed.
This method is for anybody who grows veg in a small space, an urban garden or an allotment. You can adapt the diameter and shape to suit any available space. Use chicken wire curled into a circle to collect autumn leaves. The leaves pile up high by spring and remember that these leaves will continue to rot down. To make it more secure, you could pad the edges with old cardboard or straw to keep light away from the roots of the seeds you intend to plant.
Then add soil on top of the leaf mould, followed by layers of compost or manure. By May, it should reach higher than 2 feet so place a few stakes in the wire and tighten it up. Once you settle a cucumber, melon, squash or pumpkin in here, it will enjoy the fertility of this bed. The advantages are that the support system for the climbing plant is already provided by the wire and you can move this bed after one season if you want to.
Stacking wood to make edges of a raised bed.
Some of the simplest raised beds on allotments start with piling some wooden planks or stumps on fleece and then defining the size of the bed with available sleepers, trunks or large pieces of wood. The fleece can be retained as a weed suppressant. Any leftover wood needs to be without protective sprays and chemicals or else you will be eating these. So if you suspect any of the wood may have been treated, then use a covering inside the bed to avoid any contamination. The older the wood is, the less likely it is to be dangerous but just to be safe, line the bed with an old pond liner
Tyres.
Farmers use large tractor tyres to make a deep bed and it has become fashionable if you have a supply of car tyres, to use these to make raised beds for growing flowers or vegetables. I’m ok with using them to plant flowers like marigolds for companion plants next to a vegetable bed but after a lot of research, I do not want the residue of tyres leached into my food. Read more about this in the FAQs below.
Pallet raised beds.
Pallets provide every gardener with a small budget the opportunity to be creative. As with the tyres, they may have nasty chemicals sprayed on them so check the treatment codes stamped on them before you use them. Make them into a box or rectangular shape, and tie them together with rope, clips or nails. Then fill the centre with any material available and get planting.
Compost heaps - make a hot-bed!
If your compost heap is almost ready to dig out, then just use it to plant hungry plants directly into it. My compost heaps are waist-height so if yours is similar, there is a lot of heat to take advantage of! Who doesn’t need extra space for pots at this time of the year? Place a layer of cardboard or something solid on top of the heap, and then your pots can sit on that to germinate. Cover the pots with fleece (or make a lid) to keep frost at bay and your seeds will enjoy first the warmth provided, but also the seedlings can be planted directly into the heap, once they have germinated. This is the raised bed dilemma solved – how do I fill a high bed? It is already full of the best compost available. See other ideas on how to fill a raised bed below.
FAQs
How do I fill a raised bed?
For many of the suggestions above, the material is part of the idea but other methods can include lining the area with plastic, cardboard, small logs, small stones to aid drainage and large boulders from your garden to make air pockets. Green layers of vegetable waste like peelings, lawn cuttings, fruit remains etc can be alternated with brown waste like wood chips, dried leaves or twigs. Logs will decompose more slowly so try to cut them into small pieces. The decomposing waste will also bring heat to the bed, which most plants love and as the wood decomposes, water retention increases over time so you can water the bed less. Cardboard is ok too but make sure that all paper waste is as small as it can be so that it decomposes into nutrients for the plants you want to grow.
Are tires safe for planting vegetables?
We imagine tyres are only made of rubber but modern car tyres contain a cocktail of chemicals and metals including aluminium, cadmium, chromium, copper, iron, magnesium, manganese, molybdenum, selenium, and sulphur, as well as a high level of zinc. It is all too easy for these chemicals to leach onto your grass and flowerbeds so I advise using a liner inside the tyre for planting food and salads. Tyres near ponds and wild freshwater areas have been shown to decimate wildlife, adversely affecting snails, plants and fish. If your soil is acidic, more zinc may be retained too so do not use tyre planters close to a pond or wherever fish are.
Conclusion
You can use any available materials to try out raised beds in your vegetable gardening space. From circular chicken wire to old pallets, the size and shape of your raised bed are determined by the space and materials you have available. Next week let’s look at ways to deal with common spring garden pests and diseases.