Main Menu Banner
The main menu lets you open the My Jobs view or access these help pages.
You can also logout and access your account settings from here.
Garden Planner's User Interface and Controls
This guide talks you through the functions of each of the buttons and controls of VegPlotters unique garden and allotment planner
The garden plan interface is broken down in to three sections as per the screen shot below. This guide goes in to more detail about each.

These are the main controls in the plan area section of the Garden Planner:
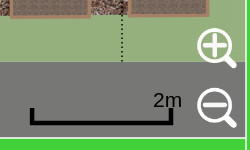
Zoom Controls
- are found at the bottom right corner of the plan area. You can use these to zoom in and out of the your garden plot / plan.
The scale of the current view is also displayed here.

Snapshot Button - found at the top right corner of the plan area. You can use this to take a picture or snapshot your plot.
You can then print out or use the image whereever you like. Why not post it on social media to get feedback on your plans from your online friends.

Measure Tool - found at the top right of the plan area, just below the snapshot button. Click it to enable the measure tool, then drag on the plan to draw a measurement line. The distance is displayed in your preferred units.
Double-click the icon to clear all measurements from the plan.
For full details see Using the Measure Tool.

Undo and Redo Buttons - found at the top right corner of the plan area once you have made some changes. You can use these to undo and redo changes that you've made to your plans. So if you make a mistake you can undo the changes.
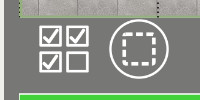
Multi-select Items control buttons - found at the bottom left corner of the plan area. You can use these to select multiple items at once so that you can move or rotate them as a group.
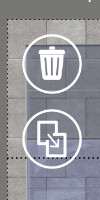
Selected Item Controls Found at the top left of the plan area. These allow you to:
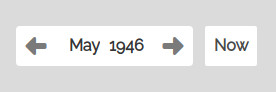
Month Selector - found at the top of the plan area. You can use this to move through the months. The plan will update to show only items that will exist in that month. As per your planting and other item schedules.
Yearly / Monthly Mode Toggle - the Y and M buttons next to the month selector let you switch between two planning modes:
Yearly mode also enables the Succession Planting option, which lets you automatically spread plantings across available months.
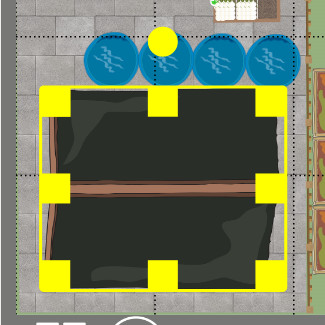
Selected Item Handle Controls - usually bright yellow (sometimes blue) they are found on an item when you select it. These allow you to manipulate the size and shape of, or rotate, an item on the plan.
The item handle controls are different depending on the type of item selected (click below for more about each):
The side panel on the right of the garden plan / plot page is where you can find items to add to your plans. It is also where you can fine tune the plot and item settings, as well as attach notes and photos to plan items.
The side panel is made up of the following parts:
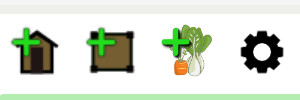
From left to right these buttons are:
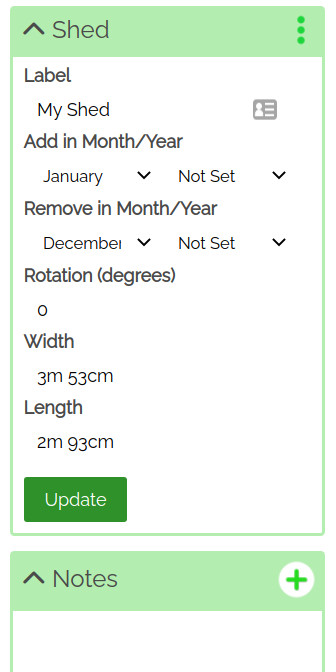
When an item is selected on the plan, a panel will be displayed in the right-hand menu showing the details for that item.
Here you can make changes and update the item using the fields displayed. Different fields will be displayed for each type of item.
You can also add notes and photos using the Notes section underneath the item details section. These will be attached to the selected item.
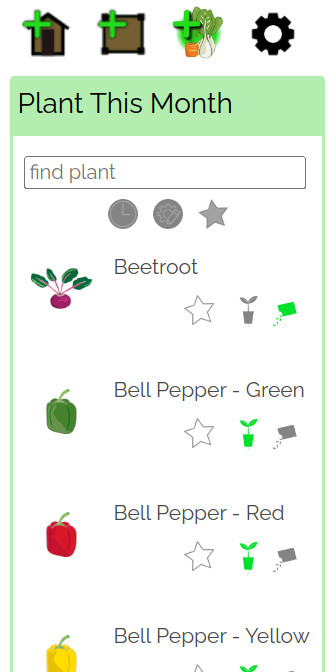
When you tap on and activate the add new item icons at the top of the side panel, the add new item panel for that type of item will be displayed. This one shows the Add New Plants panel.
This will let you drag on new items to your garden plan.