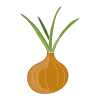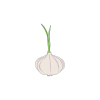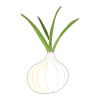
The white onion is a versatile and widely grown bulb vegetable prized for its clean, crisp flavour and bright white skin. Compared to yellow or brown onions, white onions tend to have a sharper, more pungent bite when raw but a milder, cleaner aftertaste. Their higher water content gives them a satisfying crunch when eaten fresh.
White onions are a staple ingredient in many culinary traditions, used raw in salsas, salads, and pickles, or cooked in soups, stir-fries, and stews. When cooked, they soften and sweeten, though they caramelise slightly less deeply than yellow varieties due to differences in sugar and sulphur balance.
The plants form upright hollow green leaves above a swelling bulb at the base. Like all onions, they are sensitive to day length, which triggers bulb formation — so selecting a variety suited to your latitude is important for a good harvest.
White onions are an excellent choice for gardeners who want a reliable, productive crop that stores well when properly cured, and that complements a wide range of other vegetables in the garden.
How To Grow
Starting Your Crop
White onions can be started from sets (small dormant bulbs), transplants, or seed:
- Sets are the easiest method — push them into the soil with the pointed end upward, about 2–3 cm deep.
- Seeds started indoors 8–10 weeks before the last expected frost give a long head start in short-season climates.
- Transplants from a nursery offer a middle ground between convenience and growing season length.
Site and Soil Preparation
Choose a full-sun position receiving at least 6–8 hours of direct light daily. Onions are heavy feeders and thrive in:
- Well-drained, fertile soil enriched with well-rotted compost or organic matter
- A neutral to slightly acidic pH (6.0–7.0)
- Avoid heavy clay or waterlogged ground — onions are very susceptible to root and bulb rot
Work the bed deeply and remove any stones that might impede bulb development.
Planting
- Space sets or transplants 10–15 cm apart in rows 25–30 cm apart
- Plant seeds or sets early in the growing season once soil temperatures reach at least 5°C
- Day-length sensitivity is important: choose long-day varieties for higher latitudes and short-day varieties for lower latitudes
Care and Maintenance
- Watering: Keep soil consistently moist — approximately 2.5 cm of water per week. Irregular watering leads to split or bolted bulbs.
- Weeding: Onions have shallow roots and compete poorly with weeds. Weed frequently or apply a light straw mulch to suppress growth and retain moisture.
- Feeding: Apply a nitrogen-rich fertiliser every 2–3 weeks during the early growing phase. Reduce nitrogen as bulbs begin to swell to avoid excessive leafy growth at the expense of the bulb.
- Hilling: Avoid earthing up around the bulb — onions need light exposure at the neck to develop properly.
Bolting
If plants send up a flower stalk (bolt), remove it promptly. Bolted onions stop forming bulbs and will not store well.
Harvesting
When to Harvest
White onions signal readiness in a predictable way:
- The neck (just above the bulb) softens and weakens
- The green tops turn yellow and flop over naturally
- Wait until 75–90% of tops have fallen before harvesting — too early means the bulb isn't fully dormant; too late risks rot
Avoid forcing the tops over by hand, as this can introduce infection at the neck.
Lifting the Bulbs
- Use a garden fork or trowel to loosen the soil 8–10 cm away from the bulb before lifting
- Lift rather than pull — yanking by the leaves can damage the neck, allowing rot to enter
- Shake off loose soil gently — do not wash with water
Curing
Curing is essential for storage and develops the protective papery outer skin:
- In dry conditions, lay bulbs on the soil surface or on raised netting for 1–2 days in the sun
- In wet or humid conditions, move bulbs immediately to a shaded, well-ventilated area such as a shed, porch, or greenhouse staging
- Spread in a single layer so air circulates around each bulb
- Cure for 2–3 weeks until roots are brittle and the neck is completely dry and shrivelled
Trimming and Storage
Once fully cured:
- Trim roots to about 0.5 cm
- Cut dried foliage to 2–3 cm above the bulb — cutting too close breaks the seal
- Store in a cool, dry, well-ventilated place. White onions have thinner skins than yellow varieties and do not store quite as long — aim to use within 2–3 months of harvest
- Inspect stored onions regularly and remove any showing soft spots or mould
Common Problems
Common Pests
Onion Fly (Delia antiqua)
The larvae tunnel into bulbs and roots, causing plants to yellow and collapse. Prevent by covering with fine insect-proof mesh at planting time. Crop rotation is essential — avoid growing alliums in the same spot for at least 3–4 years.
Thrips
Tiny insects that rasp the leaf surface, causing silvery streaking and distorted growth. Worst in hot, dry weather. Encourage natural predators and use fine mesh as a barrier.
Stem and Bulb Eelworm (Ditylenchus dipsaci)
Causes distorted, puffy foliage and rotting bulbs. There is no chemical cure; remove and destroy affected plants and avoid growing alliums on the same ground for several years.
Common Diseases
Onion White Rot (Sclerotium cepivorum)
A devastating soilborne fungal disease causing fluffy white mould at the base of bulbs and yellowing leaves. It can persist in soil for many years. Remove affected plants promptly; do not compost. Rotate crops rigorously.
Downy Mildew (Peronospora destructor)
Grey-purple furry coating on leaves in cool, wet weather. Ensure good spacing and airflow. Avoid overhead watering.
Neck Rot (Botrytis allii)
A fungal rot that enters through the neck after harvest, especially if curing is inadequate. Cure thoroughly in a dry, well-ventilated area before storage.
Bolting
Premature flowering is triggered by cold spells followed by warm weather, or by planting sets that are too large. Remove flower stalks immediately if they appear. Bolted onions will not store well.
General Prevention Tips
- Practise crop rotation — avoid planting alliums in the same bed more than once every 3–4 years
- Ensure good drainage to reduce fungal disease risk
- Remove and dispose of any diseased plant material away from the compost heap